Author Archives: Lee

The Ultimate Guide to Shaving with Acne Part 1

Seeing as this is a straight razor blog, most of my readers are probably past their teenage acne years. However, adult acne is a persistent and insidious problem for some people. Not to mention nearly every single young adult ever to walk the face of the planet. So, for those of you suffering from any type of acne, this article is for you.

Preliminary Information

Acne is no joke. It affects millions of people in America alone. Follow this guide and your acne breakouts, nicks, & cuts will be reduced. You’ll also have better skin. A proper shave will help prevent inflammation in the hair follicles, aka shaving bumps (Pseudofolliculitis barbae). These bumps occur because of hair being trapped in the follicle, leading to infection and acne. Acne.com. Most sources agree that exfoliation helps prevent acne. These sources also agree that a non-alcohol astringent after the shave helps prevent acne as well. One person recommends Alpha Hydrox AHA Enhanced Lotion or Sudocrem Antiseptic Cream for a post shave routine. All sources agree that preparation is key. Using quality tools and ingredients reduces the likelihood of breakouts and makes shaving more pleasurable.

Now, on to the article.

Introduction

Acne is a problem I am intimately familiar with. While I did not have terribly bad acne as a teenager, I suffered through breakouts, blackheads, and pimples just like the rest of the world. As a young adult, I was dismayed to continue to have the occasional pimple. Usually connected to stress or bad eating, I continued to have acne for a long time. As you can see, I am intimately familiar with this topic and how to combat both teenage and adult acne. Reading this article, you will learn the best practices for shaving with acne, how to combat acne, and better facial care tips.

This article aims to be a comprehensive guide on how to shave with acne. It will cover the best shaving equipment to use, best practices, and post-shave routines. This article is broken into two parts for length. In the first part, I discuss equipment, wet shaving, and preparation. In the second part of the article, I take you through the shave, post shave routines, and what worked for my acne.

If you have very bad acne, seek professional help. You won’t regret it. If you can’t afford a dermatologist, strongly consider growing your beard out instead of shaving. For those with less severe or adult acne, read on for ASR’s shaving recommendations.

Modern Razors are Junk

The first razor most young men are introduced to is probably either the Gillette or Schick plastic cartridge based razor. So much marketing has been pumped into these brands that it is practically impossible to avoid using one when one first starts shaving. What the razor companies don’t want you to know is that a multi-blade razor is the worst way to shave. Not only can multi-blade cartridges spread bacteria, but they are made using the cheapest method available.

Let’s start with the unsanitary aspect. Multiple blades makes cleaning these razors impossible. An alcohol or disinfectant dip would work wonders in keeping these razors clean, but I’m willing to bet that virtually no one does this. In addition, the construction of the razor makes drying them out equally difficult; a bacteria friendly environment. Combine that with the general humidity of the bathroom and the razor isn’t looking terribly sanitary anymore.

Not only are these razors potential sponges for bacteria, they are not the sharpest tool on the market. Multiple blade cartridges work by first pulling up the hair and then cutting with the subsequent (and equally dull) blades. Perhaps Gillette and Schick can explain why a sharp razor pulls up the hair before cutting; or why a super sharp razor needs five blades to cut a single hair close to the skin. Herbert Goodheart, MD author of Acne for Dummies recommends against modern 2+ blade cartridges. Not only do these razors fail at shaving, they are extremely likely to cut any pimples/breakouts you might have.

The truth Gillette doesn’t want you to know is that a single truly sharp blade will cut the hair in one pass just as closely as five blades in a modern cartridge. In addition, the single blade will only make a single pass over your face, whereas a cartridge goes over your face two to five times in a single swipe. Doing the math, that is 2x-5x more likely to cut open and infect acne breakouts. Do yourself a favor and ditch the modern cartridges. Your wallet and face will thank you.

Not only are these multi-blade cartridges less than razor sharp to begin with, but they go dull incredibly quickly. Razor dullness increases the likelihood of cutting into breakouts – I keep mentioning this because cutting pimples is one of the worst things you can do. When I last used a cartridge over a decade ago, the instructions said to replace the cartridge every five days. While my memory may be foggy, I distinctly remember the cartridges going dull much quicker than the five day replacement plan. I also remember them being horridly expensive.

A better option than multiple blade cartridges are single use disposables. While not as sharp as other options, single use blades don’t run the risk of growing bacteria and since you only use it once, are slightly sharper. They do however, clog up landfills just as multi-blade systems do.

Electric shavers are probably the second most common method of shaving in the U.S.. However, they receive mostly negative, but mixed recommendations. Most sites only recommend them as a final alternative.  Best Acne Treatments says stay away from them altogether. Acne.com, however, recommends electric shavers. That said, some people report good results with an electric shaver. We recommend trying other methods first. Dry shaving is not good for your skin and neither are electric shavers. That said, electric shavers do have a much lower risk of cutting or irritating acne breakout areas due to the electric razor’s aversion to giving a close shave. A beard trimmer is a workable solution however; it doesn’t attempt to shave, but rather trims the beard.

DOUBLE EDGE RAZOR
Merkur Long Handled Safety Razor

279 Amazon.com reviews
DE BLADES
Feather Double Edge Razor Blades

56 Amazon.com reviews

Wet Shaving is Better

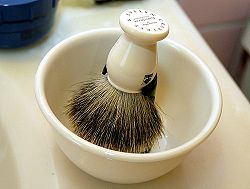
By far the best option is traditional wet shaving using a double edge or straight razor. Traditional wet shaving is so named because we use water and soap to create our lather instead of squirting it out of a can. Now, don’t get me wrong, squirting lather out of a can is extremely convenient. However, let’s think about this for a second. Shaving gel is canned aerosolized lather. Canned gel’s sole purpose is to lubricate the face so that the blades can cut hairs. Traditional wet shaving is a more intricate process that requires building the lather from water and soap/cream using a badger/boar/horse hair brush. Click here to learn how to shave with a straight razor from start to finish.


Benefits of Traditional Wet Shaving

  1. Better skin health
  2. Better exfoliation of dead skin cells
  3. Cleaner skin
  4. Greater control over the shave
  5. Lower cost over the long term
  6. Higher quality shaving products
  7. Protect the environment

Traditional wet shaving is better for the very reason that it is wet. Water-logged facial hair is infinitely easier to cut than dry facial hair. The limited water in canned shaving gel is there solely to make sure the lather is still lather. Wet shaving utilizes the water to both soften the hairs and build the lather. In fact, it is said amongst the wet-shaving community gurus that lather’s only purpose is to hold water. Not the other way around. Water provides both the lubrication and the softening agent. In fact, many straight razor shavers use only water for their final pass because it is slicker. The more water comprising your lather, the slicker the shave. Now, I’m not saying that shaving gel doesn’t work. It does. I used it for a long time with a straight razor before I made the switch to badger and soap. Which brings me to my next point: the act of lathering helps exfoliate and lift hairs.

By working the lather into the skin and beard, we exfoliate the skin by scrubbing away dead skin cells. This effect is magnified if you decide to face lather instead of bowl lather. I much prefer face lathering. Its quicker and gets more water on your face. In addition, while applying lather to your face by hand mats the hairs, applying lather by brush raises them up, making for a much closer and easier shave. Finally, traditional shaving soaps provide emollients to your face, moisturizing and lubricating your face.

While all of the above is great and all, perhaps the greatest advantage to wet shaving is the equipment. Unlike a multi-blade cartridge, a DE or straight razor is much less likely to grow bacteria. In the case of a straight razor, the odds are practically zero.

A DE comes apart into its constituent parts. A straight razor only consists of the blade and two scales which protect the blade and user. Cleaning these two time-tested shaving implements is simple and easy. Contrary to what some people think, dry steel is extremely inhospitable to microbes. While we here at ASR firmly believe that you should shave with a straight razor, because it is the best method of shaving, we also understand that it is not the easiest thing to learn. However, if there ever was a good time to learn a new skill, it would be when you first started shaving. That said, the DE makes an acceptable substitute.

What makes these two methods superior to modern cartridges and disposables is the blade quality. Double edge blades are still made using hardened steel. While not built to last like a straight razor, they are still miles ahead of plastic disposable razors. I am not going to explain why a straight razor is sharper than other shaving implements, if you want to learn more browse through my straight razor shaving articles. Suffice to say, straight razors can be even sharper than DE razors due to the better materials, manufacturing, and sharpening process/options.

PRE SHAVE CREAM
Proraso Pre Shaving Cream 3.6oz$13.005 STARS14 Amazon Reviews
PRE SHAVE OIL
The Art of Shaving Pre-Shave Oil, Unscented
$21.434.5 STARS38 Amazon Reviews
FACIAL WASH
pHisoderm Anti-Blemish Facial Wash (Pack of 4)

58 Amazon.com reviews
DERMATOLOGIST RECOMMENDED
Neutrogena Oil-Free Acne Wash, 9.1 Ounce (Pack of 3)

20 Amazon.com reviews

Preparation is Key

All authorities on the subject agree. Shaving prep is key to both preventing acne and making the situation worse. Preparation is extremely underrated in today’s world. Not only does a clean face mean less chance of contamination, but washing your face helps to soften the hairs, making for an easier shave. Water logged hair is softer than dry hair; meaning they are easier for the razor to cut through. In addition, daily facial cleansing and exfoliation is key to fighting acne breakouts.

It is essential that you prepare your skin for your shave. Wet hair is more than twice as easy to cut than dry hair. Warm/hot water will soften your beard, resulting in a much more comfortable and less irritating shave. Probably the easiest way to achieve this is to shave at the end of your shower or immediately after exiting the shower. If you can’t manage to shave after showering, try to wash your face before you shave at least.

Each person’s face is different and will respond to different cleansers differently. Choose the right one for you and use it as recommended. Twice daily is enough for most people. And since your already washing your face, you might as well take the time to shave as well. Washing your face before you shave is a great way to prep your beard. You should really think about shaving right after washing your face. I’ll explain how you can save time using this method if you wet shave in a little bit.

The “luxury” barbershop shave method involves wrapping a towel around your face for five minutes, getting a facial massage, and lathering your face once to let the soap sink in before the actual second lather and shave. Obviously that’s a ton of time to invest. The better alternative is to shower. The hot water of the shower will do the same thing that five minutes of hot towel does. Although, admittedly I prefer the hot towel. Barring that, at least wash your face before you shave.

In addition to showering and/or washing your face, you should think hard about using some pre-shave products. While not necessary, users report good results from using these products. Applying a pre-shave oil before shaving will further soften the beard as well as assist with razor glide and offer more protection. Apply pre-shave oil to damp skin. You only need a few drops for your full beard. Massage the oil into the beard, going against the grain very gently. This will help lift your hairs.

If you are wet shaving, you need to soak the badger brush for optimal performance. If you don’t soak the brush, you’re going to have a hard time building a lather without constantly dipping the brush in hot water. Building a good, wet, lather will help the razor glide across your face rather than fight every single hair in a contest to rip your face apart. If you choose to forgo wet shaving, then add water to the canned goo of your choice. The additional water will make the lather slicker and better. Also, try to rub the lather into your beard going against the grain with your fingertips. This helps exfoliate and stick the hairs up. Again, a badger brush works infinitely better.

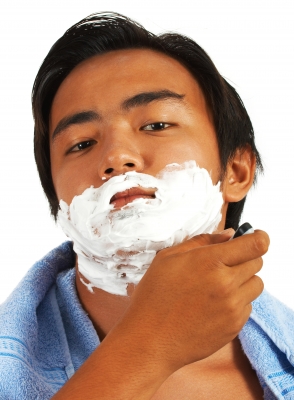
Continued in Part 2 Here.

Hard Water Lathering Problems – You Should Try Filtered Water

All of us want a better lather right?  In our search for a better lather, we have found RO water to be far superior to tap water.  Now, if you live in someplace like Hawaii, where the water is pristine, fresh, and is not hard… well, we hate you.  But for the rest of us, hard water is a cold hard reality.  Hard water makes for a less than stellar lather, does not produce as much lather, is not as slick as it can be, and is hard on your brush(es).  The solution is filtered water.  Removing all or most of the calcium and fluoride will make for a much better lather, and keep your brush cleaner, longer.

Why Hard Water is Bad

First, we must examine what hard water is. Hard water is water that has a large amount of dissolved minerals, such as calcium and magnesium. The more minerals in your water, the harder it is. In fact, the term hard water originated from our forebears having difficulty lathering with said water. It was, and still is, “hard water” to lather with. Getting even more technical, it is the Group 11 alkali earth minerals (particularly calcium or magnesium) which make the water hard. Learn more about them here. These minerals are either missing or in significantly reduced concentrations in soft water. I don’t know why its called soft water other than its the opposite of hard.

So why do the minerals interfere with the lathering process? Well, believe it or not, hard water makes lathering any soaps harder. Including your daily hand, dish, and body cleansing soaps. Soap is made from sodium byproducts, the result of combining animal or vegetable oils and fats with lye in a process called saponification, that easily bubble into a full lather when combined with pure water. When combined with soft water, the soap serves as a surfactant. The Calcium and Magnesium molecules interferes with this process. Instead of producing rich, bubbly lather, hard water makes a white precipitate (soap scum) instead. “This effect arises because the 2+ ions destroy the surfactant properties of the soap by forming a solid precipitate (the soap scum).” Wikipedia.

Thus, hardness is scientifically defined as the soap consuming properties of a water sample.

While there are many methods used to combat hard water, from boiling the water to using baking soda. The best method by far is to use enhanced water. Enhanced through actual filtration or through a soft water system.

Filtered Water

I really like RO water, but understandably, most people do not have RO systems in their houses, and they are expensive. Bottled water would be ridiculous. A water filter from Brita or Pur is not particularly expensive and will produce good results. Either the over the faucet or pitcher model will work well. And you get to drink better tasting water!

If you want the same results as RO water without the expense, go to your store and pick up a gallon of distilled water. It should only cost a dollar or two. Otherwise, buy a half gallon. Distilled water is very inexpensive and will produce the same effects as RO water. If you live in a hard water area, you really need to try soft water. It makes lathering so much easier and enjoyable.

Our Must Have Straight Razor Shaving Products

These are my tried-and-true RECOMMENDED products for NEW or OLD STRAIGHT RAZOR USERS. From the razor to the soap, I’ve listed the best of the best. I have personally tested and used each of these products. Follow the advice in my blog, use these products, and you’ll experience the joys of a traditional straight razor wet-shave every morning. As a bonus, I’ve also included some top rated pre and post shave products as well.

Sure they’re a bit pricey, but they’re all one-time costs. Even the soaps last for years and years. The razor, brush, stand and strop will last your whole life and those of your grandchildren! Divided over 50 years, your paying pennies on the dollar! Compared to the popular cartiridge razors, you’ll end up saving a ton of money in the long-run! Plus, you’ll be creating less waste and saving the environment!


STRAIGHT RAZOR
J.A. Henckels Stainless Steel Straight Razor

STROP
Fromm Premium Straight Razor Leather Strop

BRUSH
Semogue Silvertip Shaving Brush

BRUSH STAND
Omega Brush Stand

SHAVING SOAP
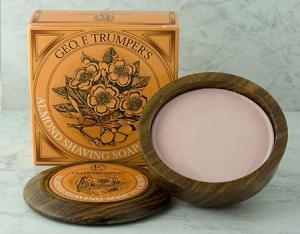
Geo F. Trumper Soap

SHAVING CREAM
Proraso Shaving Cream


We Also Recommend: 

POST SHAVE
Neutrogena Men Face Moisturizer
4.5 STARS
PRE SHAVE CREAM
Proraso Pre Shaving Cream 3.6oz
5 STARS
PRE SHAVE OIL
The Art of Shaving Pre-Shave Oil
4.5 STARS
NICK RELIEF
Styptic Pencil (Pack of 6)
4.5 STARS
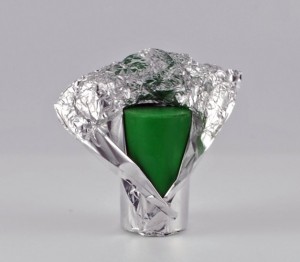
POST SHAVE ANTISEPTIC
Alum Block
4.5 STARS
SHARPENING STONE/HONE
Norton Combination Waterstone 4000/8000 Grit
4.5 STARS

True Honing – So Good It’s Patented

No, its not really patented, but it sure sounds catchy doesn’t it? The last 5% of the honing process is what everyone argues about. Yet the last 5% is what makes straight razor shaving what it is. Its what makes the shave more comfortable, smoother, easier, and closer. If all our razors were only shave ready, we might as well all switch to DE’s. They’re a lot more convenient, and you don’t have to muck around with finding the right angle and learning to use your left hand (if your truly serious about straight razor shaving). The last 5% make the straight razor sharper and more polished than a DE edge. Yet, the last 5% of the honing process is also where all the confusion, myths, hyperbole, and argument abound. There are literally hundreds of different ways you can finish a straight razor edge. I cannot even begin to list them all in general terms.

In the most general of terms there are three ways to finish an edge: pastes/sprays, natural stones, or synthetic stones. Using a paste or spray causes the edge to become more convex and the edge angle more obtuse. Clearly not desireable. We never use pastes or sprays to finish a razor. The problem with natural stones is that no two are the same. While two natural stones from the same vein may perform similarly, they aren’t exact duplicates. Thus, the hunt for that special natural stone better than the other natural stone you already own. The other problem with natural stones is that there are literally dozens of quarries these were mined from. Some perform well after certain stones, others don’t. Its a confusing morass of infinite combinations. Synthetic stones have the distinct advantage of being exactly alike. Man-made stones will perform exactly as you expect them to. However, this performance is limited to exactly what you expect from the stone. The other problem with synthetic stones is that mixing and matching doesn’t always work very well. Thus, it is generally recommended to stick with one manufacturer. This is because different manufacturers grit ratings vary wildly past 1,000 grit.

What We Do

Treating each razor individually means exactly that. Before we even get to the final polishing stage, we check and double check the razor’s sharpness. We make sure the edge is beyond shave ready before we take it to the final stones. This ensures your razor receives the utmost benefit from our final polishing. Then, based upon the razor’s steel composition, grind, customer preferences, and bevel angle we decide upon the best stone in our arsenal to get the best final polish on your razor. If your razor would benefit the most from a scary sharp, but harsh Shapton 30k stone, we use that stone. For scary sharp and pretty smooth, we have a ~40k ceramic stone for that. If the edge would be smoother off of a Nakayama Kiita we use that; if an Asagi would produce a finer edge, we’ll use that stone. If an Escher/Thuringian would work better, we have that too. Some people prefer the edge off a coticule for its smoothness, others a scary sharp edge. People new to straight razors tend to have a much easier time with a smoother, but duller edge. We do that too. Years of experience lets us know the correct slurry levels for all natural stones and some synthetic stones. We can vary the slurry levels to get the edge we want.

Yet, the most important part of this final step is experience. Having sharpened/honed thousands of razors, we know exactly when to stop and how much pressure to apply to get the most out of our stones. Here’s the invisible trap: do too many laps on your finishing stone and your razor’s edge will either roll or break off; ruining all that hard work you’ve put in. Too much pressure and the edge will roll and form a burr. Too little pressure and nothing happens.

The Foundation is Everything

While we’re on the subject of pressure, pressure is extremely important in the steps leading up to the final polishing. No, that is an understatement. The foundation is vital. Not enough pressure on an earlier stone and the actual edge isn’t sharpened. Too much and the bevel is warped. If either of these two happen, the final polishing stones cannot fix the previous error. The stones will only polish the bevel above the edge and will do nothing. This is where those thousands of hours honing comes into play. Getting a razor shave ready is moderately difficult. Getting a razor beyond shave ready takes a mastery of the skill involved.

Finishing the Razor

Having chosen the right medium for your razor, we polish the edge until its just right. Visual inspection using magnification makes sure the bevel is at the correct polish level for the stone we’re using. Then, we do a final test to make sure its where we want it. Then we do a couple of laps on the stone to resharpen the razor to its previous level. This is important because sharpness tests dull the razor. The HHT test doesn’t but only because it only tests the tiniest fraction of the edge and only dulls a hair’s width of the blade incrementally. Its very important to make sure the planned cutting edge is where we want it. So, we test the whole razor.

After the razor passes the final inspection process, we strop the razor for you. This is important because stropping brings out the final shaving edge. We use the finest strops the world has to offer. Real linen and high quality cotton; horsehide and cordovan (cowhide if requested). Then, we oil the blade, put it in a plastic baggie for transport and ship it back to you to enjoy.

We hope you enjoyed this series. Sorry it took so long to write this last part, but as you can see, it is the longest post so far.

The Ultimate Guide on How to Shave with a Straight Razor

Shaving with a straight razor is a daunting task for the uninitiated. Have no mistake about it, you are putting a well honed piece of steel against your skin. But have no fear, it is no more dangerous than any other shaving method if you do it properly. This guide will take you through all the items you need and those you really really want. It will take you through the ins and outs step by step and tell you how to get the best shave you’ve ever had.

Before you get started using a straight razor, please note that shaving with a straight razor has a steep learning curve. In all likelihood you will not get a better shave for a month or longer. However, once you master the straight razor you will experience less irritation, a closer shave, and greater comfort. Plus, it is the greenest way to shave and the most cost effective too.

Introduction

European Straight Razors (AKA cut throat razor, open razor) feature a fixed blade that folds into the handle. Japanese straight razors, known as Kamisori, are a single piece of steel. Once, the only method of shaving, straight razors have become a niche art, practiced only by a few. With the recession, the green movement, and other factors, there has been a growing move back towards straight razors and Double Edge (DE) razors. Concerns such as cost, nostalgia, and “manliness” drive people back towards the straight razor.

Once you master the art of straight razor shaving, you will be able to get a far smoother shave than you can get from any modern method. However, shaving with a straight razor has a long learning curve. While many people believe shaving with a straight razor is dangerous, the reality is that it is no more dangerous than a DE or modern safety razor; you actually have to try to cut yourself or massively mess up to do any real damage.

Even though the straight razor requires a long learning curve, the benefits are worthwhile. Stick with the straight razor even though the DE shaves better and you will be rewarded. If not with a closer and irritation free shave, then by the meditative, relaxing, and manly aspects of straight razor wet shaving. Stick with it and once you have mastered the straight razor (which typically takes around 100 shaves), you will be able to consistently give yourself a shave that’s far better than any shave you’ve ever had before.

Things You’ll Need

Recommended Items

Warnings

  • Schedule the time to learn how to use a straight razor properly. Do not attempt the job if you cannot focus.
  • Make sure you are not interrupted. The worst accidents I’ve heard about happen when the person is interrupted suddenly.
  • Never try to catch a dropped razor. Odds are very good it will cut you.
  • Dry your razor thoroughly. It will rust if you don’t.
  • Follow regular cautionary procedure you use with all sharp knives.

Tips

  • Always use a shave ready razor. A shave ready razor is deemed sharp enough to shave. If the razor is not shave ready, it won’t even cut arm hairs. Shaving with such a blunt instrument is not fun. Click here to see our razor sharpening & restoration services.
  • Use styptic pencil or alum block for cuts. You can purchase a 1oz styptic pencil here.
  • Hard shaving soap that comes in pucks or sticks are highly recommended. Creams are good too. Just don’t use canned goop. Traditional wet shaving soaps produce a much better lather and are generally slicker than anything that comes in a can.
  • Wet-Shaving (using hot water and a brush to make lather) is highly recommended.
  • You can use a boar bristle shaving brush if you’re on a budget, but a silvertip badger hair brush is more luxurious.
  • Getting a good shave using a straight razor requires a certain feel that you will develop over time. Your first few shaves may be worse than the shaves you get from a DE razor, but with time and practice you will get the kind of baby’s-butt smoothness you can only get from a straight razor. If you want a little scruff on your  face, you can avoid getting such a smooth shave, and also save time, by doing a single-pass shave and skipping the across-the-grain and against-the-grain passes.
  • It is recommended to only do a with the grain pass your first few shaves and either finish with a DE/disposable or go as is.
  • Don’t store your razors in the bathroom if you can avoid it. Follow our straight razor care guideHumidity is the death knell of razor edges. The water in the air rusts the edge and breaks it down rapidly.  If you must store your straight razor in the bathroom, wrap it in wax paper and place it in a waterproof container. Before doing so, thoroughly dry your straight razor of all water.
  • Click here to learn more of our straight razor shaving tips!

The Step by Step Process

Prepare the water and soak the brush

First, prepare the water and get your brush soaking. The goal is to use hot water, not scalding hot water. A good rule of thumb is that you should be willing to place your hand in the water, if only for a few seconds. A scuttle will keep the water and lather hotter longer. We prefer using filtered water, or at least soft water. It really helps with the lathering process.

Once the water is heated and in your shave bowl or in your sink if you use that method, place the brush in the water. If you can avoid dunking the handle, try to do so. It helps prolong the brush’s life.

If you are using canned goo, and I hope you aren’t, skip this step.

Prep your beard, either by taking a hot shower, or by holding a hot towel against your face

This is important because as your hair follicles absorb water, they become pliable and easier to cut. This step is unnecessary, but highly recommended. If you opt for the hot towel; soak a small towel in hot water and hold it firmly against your face until it is cool. For best results, apply the hot towel twice. Alternatively, you can microwave a wet towel.

Apply any pre-shave oils to your face at this time.

Apply the lather to your face

Some people prefer to face lather, others prefer to build the lather in a bowl, and still others still use canned shaving cream. Whatever you choose, apply the lather to your face. Make sure the lather is very slick. You can increase the lather by increasing the water. If you use a badger brush, you can dip the brush slightly in the hot water.

Click here to learn how we lather.

(Optional) Let the lather sit for a few minutes and reapply

Using a hot towel, wipe off the first lather and then reapply. Re-moisturize your brush and lather if necessary. We do not follow this step, but professional barbers and some straight razor users do. If your beard is coarse, we absolutely recommend following this step.

Get a firm grip upon your razor

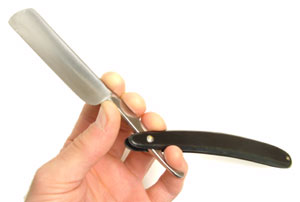
Most users use the three finger grip or four finger grip. Most straight razor grips position the scales in between the middle and ring fingers. Some users prefer to straddle the scales between the pinky and ring fingers. This is personal preference.

Use a 20°-35° degree angle of the blade to your skin. 35° is the greatest angle you should be using.

20° is a good starting point. Another tip is to lay the razor flat against your skin and raise the spine up two millimeters. Increase or the angle as required.  Remember you are not trying to dig into your skin with the blade. You are using your skin as a cutting board of sorts and slicing the hairs, not your face.

Stretch your skin; watch this woman as she shaves a customer

http://youtu.be/KlBvY5QOX3Y

You will make three passes for optimal smoothness

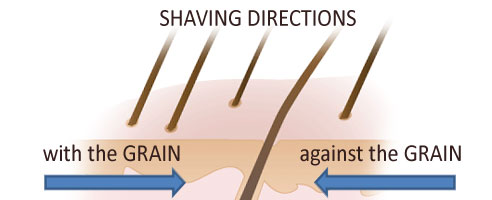
  • The first pass is with the grain. The goal is beard reduction, not removal. You will have a slight shadow if you do this pass correctly. While it is advisable to stop at this point for your first few shaves, proceed to the next step if your feeling extra confident and have excellent control over the razor.
  • The next pass is across the grain. Again, beard reduction, not complete removal. You will still be able to feel the hairs at this stage. It is very highly recommended to stop at this point for your first few shaves.
  • The final pass is against the grain. This is the hardest pass. It requires a good amount of skill and a moderate amount of dexterity to perform correctly. You are aiming to remove anything that is left during this pass.

Make the first pass with the grain (in the direction of hair growth).

With the grain gives the least resistance when you run your hands in the same direction across your beard. It is important to determine the direction of beard growth. The following method is how I personally shave. You can switch up the order in any way you wish. There is no reason you have to shave the cheeks before your neck. However, following this method makes life a little more organized.

Shave the Right Cheek

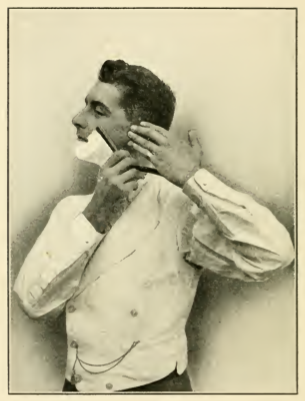
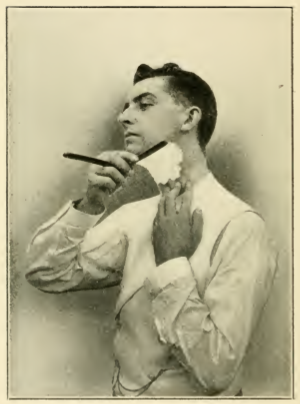
Since most people are right handed, we will start with the right side of the face. Grasping the razor as shown above, make a downward stroke (blade first) holding the blade at a 30° angle to the skin. The angle is subjective and will change based upon your hair growth and razor sharpness. Use the lowest comfortable angle for best results.

As you can see from the picture, skin stretching is essential (unless your face is perfectly taut). To stretch the skin, follow the picture. You are pulling upward and drawing the razor downwards. In other words, pull in the opposite direction of razor movement. As you shave downwards, move the left hand downwards as the lather is shaved away. Continue until you reach the jawline.

Shave the Left Cheek

There are two ways to do this side of your face. One method is to switch hands. If you choose this method, and any truly serious straight razor user does, just mirror the right side. Hold the razor with your left hand, pull with your right. I’ve mirrored the right side shaving image to help.

For those not so dexterous, follow the right side picture. As you can see, you have to change your plan of attack a little. Instead of shaving near the earlobe with the toe (tip) of the razor, you have to use the heel. Consequently, you won’t be able to get as close on this pass. The good news is that pulling with your left hand doesn’t involve reaching over your head. Anyway, just do the same thing on the left side as you did on the right.

Shave Under the Jaw

To shave under the jaw, tilt you head back to stretch the skin. Pull downwards at the bottom of your throat or pull upwards right at the jawline. The direction you stretch the skin depends upon your beard growth direction, direction you are shaving, and area you are trying to shave. Thus, pull downwards when shaving upwards and pull up when shaving down.

Shave the Chin

This is most certainly the hardest part. To do it, tilt your head upwards as before and pull down on your throat skin. It helps to shave the neck underneath the chin first. Then, placing the razor just under your bottom lip, shave downwards. Go slowly and take extra care. Not only is this skin extra sensitive, but your chin curves. Don’t go for extra close your first few times straight shaving. Just finish with a DE or disposable. Pride is not worth nicks and cuts.
The Upper Lip/Moustache

This area is almost if not just as hard to shave as the chin. Except that the upper lip is flat. The nose has a tendency to get in the way. To get around the nose, angle the blade so that the spine is touching your nose, then make a “scooping” motion to shave downwards. The XTG pass is much easier. The ATG pass is not difficult, but if done improperly can cause irritation. Leaving the mustache alone after the XTG pass is not a bad idea.

Lather up again, and make the second pass across the grain (sideways).

Repeat the above steps. Except this time, shave sideways. For example, when shaving the right side, hold the razor so that the blade is vertical, place it in the middle of your face, and shave towards your ear. Then shave the other side going the opposite direction. Repeat. I should note that an across the grain pass on the neck and chin is extremely difficult. We recommend skipping it until you develop more skill with a straight razor.

Make a third and final pass against the grain.

Beginners may wish to simply skip this step. Just perform the against the grain pass backwards. For example, on the right side of the face, shave upwards. You need to change your grip on the razor to accommodate the new direction. You also need to lower the angle of the razor until the spine is just barely hovering over the skin.

Rinse the lather off your face with cold water

Cold water will help close the pores in your skin.

Dry the razor

This is extremely important. If you fail to dry off all the water from the razor, your razor will rust and will dull prematurely. If you got water in between your scales, run a square of toilet paper between the scales

Dry the brush

More on this topic later, but suffice to say, dry the brush out as thoroughly as you can.

Straight Razor Wet-Shaving Equipment: The Only Guide You Need

Below are lists of the equipment you should have in your straight razor shaving kit. Starting from the absolute minimalist to the full kitchen sink, we’ve got suggestions for every straight razor user and their commitment/budget level.

 Click on any of the pictures to purchase.

Bare Bones Minimum

This setup is recommended for the man who just wants to try a straight razor shave before jumping in. All you need in this setup is a shave ready straight razor. We cannot emphasize this point enough. Razors from Pakistan are not shave ready and never will be. Only some razors from China can be made shave ready. Fromm straight razors need to be professionally sharpened before use. Dovo and Thiers Issard usually put a decent edge on their razors from the factory, but it is still advisable to get them professionally sharpened. If you purchase a used razor, you definitely need to get it sharpened unless it is sold by a reputable seller you trust. Assuming you are already shaving, you should already have at the very least, canned shaving cream. Follow our guide on inexpensive strop alternatives and I’m sure you’ll find something you can use lying around the house or for free. Now, all that said, going this route is not a long term solution. Without proper stropping, the razor is going to go dull much quicker than it should. Expect the razor to last a week or two at most. So, if you just want to try straight razor shaving, try to figure out if you are going to stick with it after the second or third shave. Then buy a strop or sell the razor for close to what you paid for it.


The Minimalist

Wet shaving with a straight razor is a fantastic experience and places you among a select group of men who refuse to follow the flow. If you decide to join our club, you should do it right. That means buying a good straight razor, a decent strop (or making your own), a good brush, and shaving soap/cream/stick. The wet shaving gear is necessary because if your going to straight razor shave, you should do it right. A straight razor shave using canned goop is no real straight razor shave. Shaving with a straight razor is a ritual of sorts and should be enjoyed to the fullest. This means hot water, warm soap, great scents, and relaxation. There is simply no substitute for a good brush and soap. It will bring you back to the days of our forebears. Days when men used to go to the barber for a full service shave.

Enough cannot be said about why you need a strop. Unless you want to sharpen your razor yourself every other week, not using one really isn’t an option for the long term. Lets look at it this way: a beginner can expect three to six months of good straight razor shaving before the razor should be resharpened. A veteran can expect six to twelve months of daily use if he/she strops correctly using a cloth/leather strop. As you can see, the benefits of stropping are great and the cost isn’t terribly much. Especially if you make your own by heading to your local leather store, buy a 2.5″ x 14″ strip of leather, punching a hole in one end, and threading a leather thong through it. Check out our guide to stropping part 1.

Check out Shaving 101’s similar recommendations for the minimalist setup.


The Deluxe Kit

In addition to everything in the Minimalist Kit, the serious straight razor user should add the following: an alum block, a styptic pencil, liquid bandaid, aftershave, & SPF facial sunscreen. The alum block is a natural antiseptic and is used right after the shave to cleanse the skin and stop any weepers or nicks. A styptic pencil is for stopping more serious nicks so you can apply the liquid bandaid afterwards. Or you could use a regular bandaid, but trust us, the liquid version looks a lot less inconspicuous. SPF sunscreen should be used for obvious reasons. Not only does it normally come with a moisturizer, but the SPF protects your face from premature ageing. I know, I know, men shouldn’t worry about it. Okay, well, it still protects from melanoma, which is deadly serious.

The serious straight razor user may want to seriously consider a second straight razor. The reason being that you’ll want to send the razor out for resharpening when it gets dull. Or you can spend hundreds of dollars and the same amount of hours learning to hone your own razor. The second razor serves as both a backup razor and also prolongs the time period between sharpenings. By using the razor half as much, it dulls half as quickly. We recommend a sharpening schedule something like this: send each razor out every six months, but alternate the months when you send each razor. For example, on month three send the first razor; on month six send the second razor. Then wait until month 9 to resend the first razor. Repeat.

The serious straight razor needs a serious strop. No one makes a better strop in the US than Tony Miller. There are copies, but the original is still the best. Some strops from other countries are just as good or better, but they also cost substantially more. Whichever strop is purchased, it should have a cotton/linen and leather component. Ideally you would be able to take the strop apart to both replace components if you damage the leather and flip the cloth side over. Webbing is used in some strops, but we don’t really like the webbing and cannot recommend it. Buy the cotton version. The serious straight razor user may also want a chromium oxide or diamond spray for periodic touch ups in between professional sharpenings. Read our article about how to use these components for more information.

The Complete Setup

The following products are not only for completionists, they are for the serious wet shaver. As a bonus, following this routine will immensely increase your skin health and vigor. Okay, but on to the actual products. Start with a facial scrub. You should be soaking your beard before you shave anyway. Washing your face is one of the best ways to do this. Using an exfoliant scrub is recommended by some wet shavers, but any gentle facial cleanser will do. Alternatively, you can wrap a hot towel around your face. OR you can do both! The hot water and cleansing action will open the pores, soften the hairs, and remove excess oil and skin; allowing for a closer, cleaner shave.

Follow this up with a pre-shave oil. The pre-shave oil will soften the hairs even further and provide additional glide to the shaving soap. The benefit of pre-shave oil over just water is that the oil will stay on your face longer and won’t dry out as quickly. They are also advertised to help protect the skin. In addition, pre shave oil helps with the prevention of ingrown hairs, razor bumps, and weepers. The best pre-shave oils and creams use natural oils, such as coconut, sunflower, olive or other oils drawn from plants. Unlike mineral oil, natural oils are low on the grease factor, so they won’t clog pores and cause damage to your skin. Also, keep your eyes open for pre-shave oils that contain antibacterial agents; these will help guard against breakouts and painful cuts.

Post shave, wet shavers recommend a post shave cream or oil. Aftershave can also be used, but aftershaves contain alcohol which dries out the skin. Not to mention, you should be using the alum block anyway, so you have no need for the alcohol. Post-shave products will relieve burn, dryness, razor bumps, and some will even help heal cuts. In addition, they re-moisturize your face. To make it simple, look for aftershave balms and gels that contain vitamins C and E, natural oils to moisturize and aloe to help heal the skin. Post-shave products with built-in sunscreen are also a solid purchase.

The final ingredient to the complete setup is


Everything & the Kitchen Sink

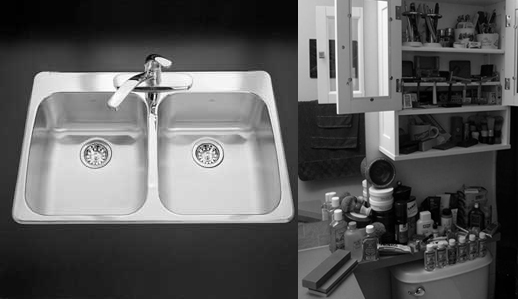
This one isn’t really a recommendation, so much as an extension of razor addiction. Unfortunately straight razor use carries the risk of a slight desire to buy more. And who can blame us? Straight razors are a collectible after all. They can last for lifetimes and they look amazing (at least to the straight razor community). Anyway, on to our recommendations for the person who has it all. The kitchen sink is pictured because this person will probably be using that sink to learn how to sharpen their razor.

This person is going to want at least one other razor. Another razor is desirable for a number of reasons. By using your razor half as often, it needs to be honed half as often. No, the fin does not grow back over 48 hours, that is just hogwash and an old wive’s tale. Another benefit is that when you send the razor out to be honed, you still have a straight razor on hand to shave with. A definite benefit. Follow our recommendations above in the Deluxe Kit. A seven day set is not unheard of. In fact, they are quite possibly the coolest straight razor sets.

This person definitely wants at least one other brush. Not only does having an additional brush cut down on the wear & tear on your brushes, but it changes up the shaving experience ever so slightly; keeping things interesting. A second brush also allows the first brush to completely dry out in between shavings. This helps reduce moisture problems such as mold or smell developing. Three brushes are even better. Four brushes might be overkill, but perhaps a seven day brush set isn’t that far fetched considering they exist for straight razors. We recommend buying different brands to keep it interesting. We like Semogue and Shavemac. Penworks also makes great brushes.

And the kitchen sink setup cannot be complete without several soaps, creams, pre-shave products, and after shave products to choose from. From every scent D.R. Harris and Geo F. Trumper produce to the entire Penhaligon’s line of EDTs, this person has it all. And why shouldn’t we have a huge variety of scents. Variety is the spice of life after all. Changing the daily routine is a great way to keep things fresh.

Don’t Forget the Hones

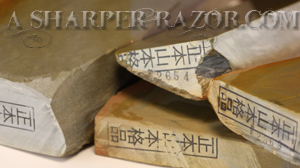
Finally, the kitchen sink needs sharpening stones. And we say the kitchen sink because outside of a sharpening pond, there really isn’t a better place to sharpen knives and razors at. The reason being that sharpening requires a water source. A spray bottle works with some stones, but for the most part, the kitchen sink provides both drainage and a steady source of water. For this person, it is hard to beat the Norton 4k/8k stone pictured above. While not nearly as good as what professionals use, the edge off the 8k stone is shave ready. Its good to go. The added benefit of this combination stone is that it comes with a stone holder/storage container. Its also beefy enough to not require an additional holder to bring it up to the correct level. For the truly serious straight razor person who wants to sharpen their own razors, the 16k stone from Shapton is hard to beat. Purchase the stone holder too for optimal performance. Other stone holders don’t work too well with the glass/ceramic Shaptons. Again, the edge can get better but at that point, your possibly losing money compared to just sending it out for professional servicing.

The Survivalist

The survivalist’s end of the world scenario probably doesn’t include shaving at all. But the self sufficient attitude will permeate into daily life. The straight razor is the only choice for the self sufficient male. Unless this same person can forge their own razor, they’ll still need to buy one in the open market. This man will make his own strop out, preferably out of the hide of an animal he’s killed himself. There are tanneries that do this. Alternatively, he can strop on the palm of his hand and on the pants he’s wearing.

When the end of the world comes, shaving is an absolute luxury. A brush and soap is going to last a lot longer than canned shaving gel. We have no specific recommendations for the end of the world, but a boar brush might be more rugged than a silvertip shaving brush. Omega makes a nice one. Any soap should do; the problem would be finding water. The end of the world is going require the survivalist to maintain his knives and razors himself. Consequently we recommend the Norton 4k/8k or a Coticule. Either stone is incredibly versatile and can sharpen both knives and razors.

Problem Razors: The Rusted Razor

In this series we will explore fatal razor problems. We either cannot hone or restore the razor, the odds of success are too low, or the cost of restoration far exceeds the benefit/value of the razor. We will post pictures and provide you, the reader, with detailed explanations of what is wrong with the razor and what to look out for when purchasing old/vintage straight razors.

In this article, we look at the problem of rust. Rust is the killer of all things steel. As I pointed out in this article, carbon steel is made up of iron and carbon. Unfortunately, iron’s natural form is iron oxide. Thus, steel continually wants to revert to this form; we call it rusting. As you well know rust eats away at the structure of steel, both weakening the surrounding metal and causing catastrophic holes in the steel. Rust is just as bad for straight razors.


How to Prevent this from Happening

There is hope though. If the rust is only on the surface and hasn’t eaten too deep, the result may be only cosmetic in nature. If the rust has developed over a long time, pits have developed. When the rust is removed, these pits will look like craters in the steel. Again, this is a cosmetic issue as long as the pits are not near or on the edge. If there is any pitting or rust on the edge, the razor is in trouble.

We can remove the rust in the edge, but if there is no good steel above the rusted edge, then there is no hope. A close visual inspection can ascertain the odds of success, but only after removing the rust can we be certain whether the steel structure is sound. Conversely, if the rust is on the spine or nowhere near the edge of the razor, the razor is fine. The rust is cosmetic in nature only.

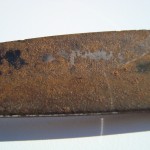
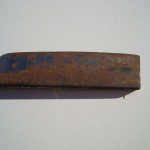
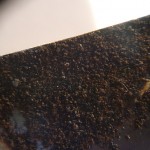
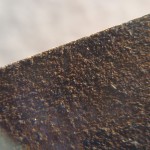
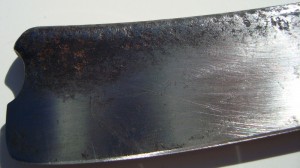
The pictures at the beginning of this post show a razor that is beyond saving. The edge is covered with rust. Below are closeups of the edge. The razor is a wedge, so there is a remote possibility of it being saved. The process involves regrinding the razor and removing the entire affected edge until good steel is revealed. The cost of such an operation is extensive. As you can see in the photos below, the rust was thorough and pervasive. This razor has seen the end of its useful life. Sadly, with just a little more care, the razor could have been easily saved.

Why these razors cannot be saved

In this  section I will go over why these problem razors either cannot or are not worth saving. Although if the razor is priceless, it might be worth trying to save it. In this particular case, the rust is extensive. As you can see in the above photos, the rust not only goes up to the edge, but it covers the entire cutting surface. A 20x closeup shows just how bad the rust has eaten away at the steel.

This razor can be made shiny again. Do not doubt that. However, the areas of steel that the rust has eaten away will remain. They will remain as craters in the surface of the steel. Now, as I’ve said before, if these craters were only on the face of the razor, not the edge, they would only be aesthetic. However, when these craters appear on the edge of the razor, it presents a problem. The straight razor restoration community calls the problem “the Swiss cheese effect.” We call it that because the edge looks like Swiss cheese when viewed under magnification. This is a fatal flaw because a razor’s edge needs to be perfectly smooth in order to shave well. Now, just looking at the photos you wouldn’t want to shave with the razor in its current condition. But what if I told you, I could grind away all that rust and expose shiny, new metal underneath? Sounds promising right? Okay, but now what if I told you that even though I could make it shiny again, the razor’s edge would be riddled with pock marks and craters? See the below photo and extrapolate what the edge will look like with all those pits in it. Again, click for higher resolution.

Okay, your focusing on the top of the razor. See those craters? Those craters are the pits. Now, as you can see, those pits run deep into the metal. Take note: this razor is in excellent shape; the rust is nowhere near the edge, any rust that was I was able to grind away and expose fresh, clean metal underneath. Okay. Now, imagine those pits in the edge of the above razor. That’s pretty much exactly what the edge is going to look like. The edge is going to have holes everywhere. Yet, that is not all that rust does. Read on for more info on crumbling.

Now that I’ve shown you the obvious visual signs of why you wouldn’t want to shave with such a jagged edge, I’m going to explain another phenomenon that rust does. We call it crumbling. Rust not only infects the surface of the razor, but as you can see, it digs in deep and forms large craters if left unchecked. Yet, rust doesn’t form perfect little craters, rust acts like a plant’s roots, expanding into the metal and digging in eroding the good steel and turning it into iron oxide. Just like a tree’s roots dig deep and expand in all directions, so too does rust.

This expansion into the heart of the steel is invisible. It is the silent killer of straight razors. These rust tendrils cause catastrophic collapse of the steel structure. They undermine the crystalline structure of the steel and erodes the supporting molecules. In other words, the rust weakens the steel causing it to crumble under pressure. What this means is that when the razor is being sharpened, the rust will crumble away due to no structural strength. In other words, the razor cannot get sharp. It won’t hold an edge. Well, it will still cut, but you wouldn’t want to shave with it. Unfortunately, the only way we can tell whether this crumbling effect is going to happen is when we hone the razor.

The good news is that its not all doom and gloom. Even if the edge crumbles, wedge razors can still be saved. This is because of the large amount of steel left on the razor. We can grind away the bad edge until good steel is found. Not so much with hollow razors. Yet, like all things, it depends. Send us pictures for an assessment. Okay, now the bad news. The bad news is that this process takes hours. Consequently, it is extremely expensive. All hope is not lost, but all hope of a restoration costing under $200 is.

Everything You Wanted to Know About Pastes, Sprays, and What to Put Them On

Chromium Oxide pastes and diamond sprays are the easiest method to keep your razor sharper for longer. We’ve had several questions regarding what are the best practices with regards to these sharpening compounds; and sharpening compounds these are. They are used to slightly sharpen the edge and should not be used for daily stropping. While there is heated debate as to whether the edge degrades over several uses, using pastes/sprays undoubtedly makes a dull razor a little sharper. In our experience, while pastes/sprays prolongs the need for sharpening on stones, the edge from stones is still superior (a good explanation of why can be found here). The two main types of sharpening compounds are chromium oxide (which comes in a crayon, powder, or paste form) and diamond sprays.

Chromium Oxide (aka Crox)

Whichever medium of chromium oxide you use, the best stropping medium we have found is plain old cotton. A close second is linen, followed by the rough side of a leather strop. The smooth (good) side of a leather strop is also a decent medium but ruins the strop for daily stropping. If you don’t happen to have any of these, balsa wood is an acceptable medium. We haven’t had much success with crox and wool felt; your mileage may vary. Best practice is to apply the chromium oxide to the opposite side of the cotton/linen/leather you use for your daily stropping. This way you can flip the piece over when you need to touch up the razor, but at all other times you use the clean side for daily stropping.

Chromium oxide used for sharpening applications is normally found in .5 micron grit size. Grit size is used loosely because both grit and micron are different terms of measurement. .5 microns is generally regarded as being the equivalent of 20,000 to 35,000 grit. The .5 micron size is generally well liked and most users report a smooth shave. We recommend purchasing .5 micron if you wish to use crox.

Diamond Spray

Diamond sprays only come in one medium: a spray bottle of diamond powder suspended in a liquid. To use diamond spray, very sparingly spray the diamonds over the length of the stropping medium you wish to use. In our experience wool felt is simply superior to all other materials. Cotton and linen come in second place, but due to their more rigid and less cushioning surface tend to produce a harsher edge. The back of a leather strop can also be used. The smooth side and balsa wood did not produce very good results for us.

Unlike crox, diamond sprays come in a wide variety of sizes. From .125 microns to 5 microns and up, diamond sprays can be had in many different micron ratings. The .25 micron is as small as we recommend. In fact, we find the .25 micron to be pretty harsh on the face. We should also take the time to note that many people find the chromium oxide to be smoother than diamonds; even in equivalent micron sizing. This is probably due to the nature of the cutting particles. Where crox particles are generally circular in form, diamonds are crystalline by nature. These crystals invariably produce more jagged cuts in the steel than the circular crox particles. That said, diamond pastes come in a smaller micron rating. Choose accordingly.

Crox v. Diamond Sprays

There is much debate over which one is better. The general consensus is that diamond sprays are sharper, but harsher, and crox is smoother, but duller. As I said above, this is due to the nature of the cutting molecules. However, the medium plays a large role in how the spray/paste affects the edge. For example, using crox on balsa wood will make the edge harsher, and a bit sharper. That said, the end result isn’t very pleasant compared to better options. Crox on a smooth leather strop will give you that sharp razor you want, but you lose a bit of the smoothness. My favorite is crox on cotton. Sharp enough for daily shaving, but still smooth and irritation free.

Diamond sprays are inherently sharper than crox. Crox only comes in .5 micron sizing at its finest grit. Diamond sprays come in a bewildering array. From .125 to 16 microns, you can find a diamond spray or powder for whatever application you need. .25 micron diamond spray is generally the smallest your going to find in spray form. At least one seller sells the .125 micron size; yet he’s the only one I’ve found so far which puts his claim into question. Either case, the diamond spray allows you to go sharper. Yet, you get a harsh edge because of the way the diamonds cut into the steel, as I said above.

To ameliorate this problem, straight razor users have come up with a variety of methods to combat the harshness. The most popular method by far is using a felt medium. And honestly, until we come up with something better; felt is as good as it gets. Yet, felt comes with its own problems. The very reason felt works in softening the edge is because the felt is so cushioning. Press down on the felt and it dips a little. Not so with cotton or balsa wood. Okay the balsa will compress if you press hard enough. But that is the inherent problem with diamond sprays and felt. The felt allows much more deflection in the cutting surface than any other method. Now, this deflection creates a more obtuse edge angle, but not by much. Perhaps over time the angle’s obtuseness becomes evident, but not for a while. Even then, you can still shave with a more obtuse edge angle.

So, in the end, the diamond is sharper due to the smaller micron sizes available. Yet, the crox is more than sharp enough and is smooth. In the end, it doesn’t really matter, both methods are eclipsed by physical stones and actual honing. Yet, both methods produce a serviceable edge that will get the job done.

ASR Reviews: Geo F. Trumper Hard Soap


I’ve been using Geo F. Trumper hard soaps for over two or three years now. A few years ago, they reformulated to a vegetable oil based formula. The old stuff was based off of tallow and worked great. The great news is that the absence of tallow in the new formulation is hardly noticed! Whatever GFT has done, they have actually replaced tallow with something other than glycerin! And it works amazingly. This article will cover both the old formula and the new formula. Of course, as you can already tell, since the new formula performs almost identically to the old tallow formula, there isn’t much difference in the results.

Lather

These soaps load up extremely easily. Possibly quicker and easier than Tabac. Definitely a little easier than DR Harris soaps and Mitchell’s Wool Fat. Just a few seconds of loading on the puck and your good to go. The soap also loads just as easily using a denser brush. Normally my Shavemac takes a few more seconds to load, not so with GFT. I can get a great load with just a second or two more. I should note that GFT soaps seem to be more “hydrated/moist” than the other tallow soaps I’ve tried. This could be responsible for the ease of loading. Yet, whatever the reason, it is a joy to load the brush. It loads quickly and easily. Better than most glycerin soaps too.

The lathering process is also quick and easy. Face lathering produces a great, thick lather in one pass. Bowl lathering produces a thick lather very quickly. GFT is not as finicky as DR Harris, responding well to a greater variety of water to soap combinations. They lather up pretty similarly to Tabac. Very easily and thick if desired. Shaving with Geo F. Trumper soaps is just as pleasurable. The cushioning is great and the slickness is exactly what Iexpect from a good tallow soap.

Purchase your favorite scent by clicking the picture below.

Fragrance

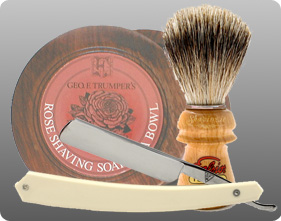
Geo F. Trumper has a wide variety of scents. Each smells great. I particularly like the rose and sandalwood scents. Other notable scents are lime and violet. However, since the violet smells almost exactly like DR Harris’ violet, there isn’t much reason to own both. Click here to go to Geo F. Trumper’s site and see the entire list.

Performance

The performance of this soap is amazing. Both the reformulated and tallow versions provide a nice, thick lather that doesn’t dry out quickly (if that’s what you want). Or, if you prefer a thinner lather (I think it works better for straight razor shaving), GFT soap works great for that too. Personally, I like to use a slightly thicker lather for the WTG pass. I like the added scent and the cushion-y feeling I get. Then, I just dilute the lather for the ATG pass. Either case, the cushioning feels amazing. Its like the razor is a hovercraft hovering an atom above your face.

More important than the cushioning is the glide. GFT is slick. It allows the straight razor to do its thing without interference. Unlike glycerin based soaps, this formulation is, again, amazing. I can’t say too many great things about this soap. I wish I was paid to say these things…. Anyway, the glide is great. Glide is extremely important for straight razor wet-shaving because a straight razor doesn’t rely upon teflon for reducing friction. Instead the straight razor relies upon the edge polishing. A slick lather helps the straight razor cut through the hairs like a laser through…well, everything. To make most lathers slicker, you dilute them with water. In GFT’s case, it responds exceptionally well to dilution. Some soaps just turn into water if you dilute them too much. GFT can be diluted pretty far before that happens. Your virtually having water being suspended on your face by this soap.

Value

Geo F. Trumper hard soaps are sold in 80g pucks. They also cost a pretty penny at ~$20/refill when you add shipping. However, the scent and ease of lathering is above par. Also, these refills are likely to last you a long, long time. Perhaps even two years. We haven’t even dented ours after over a year of use. So, regardless of the cost compared to other soaps, any shaving soap is actually a great value over the long term. That said, the consumer should take care not to buy too many refills because they last a very long time. You could have a lifetime’s worth of shaving soap if your not careful.

New Formula

Geo F Trumper redid their hard soap formula several years ago. While the original experiments didn’t receive much praise, the stuff their selling today will impress. The difference in performance between the tallow soaps and non-tallow versions is minimal. I daresay you wouldn’t even be able to tell the difference in a blind lather test. While tallow is a great indicator of a soap’s “awesome-ness” it isn’t the be-all-end-all. Now, that isn’t to say that glycerin based soaps are better; they are different and will always be different until someone figures out a new way to make glycerin based soaps. Now, all that said, the new vegetable-formula by GFT is amazing.

This new formula simulates the cushiness and slickness of tallow extremely well. It should be noted that tallow isn’t the magic bullet. Other ingredients play a key role too. The new formula provides both a great scent, ease of lathering, and everything you expect from the tallow formulation of this soap. If you try it and still think the tallow version is hands over fist better, I’ll buy the puck off you for what you paid for it. I’m that confident you’ll like it. However, GFT isn’t using this new formula in all their hard soaps. As of this publishing date, their Eucris soap is not the same formula as their other soaps. Consequently, this review does not apply to the Eucris formulation. In other words, don’t buy it based off this review.

All in all, the vegetable formula is a smash hit. GFT did a great job in reformulating the soap and making it vegan friendly. GFT still remains a top soap in my shave den.

Liquid Bandaid – Every Man Needs This in His Shave Kit

Click to Purchase


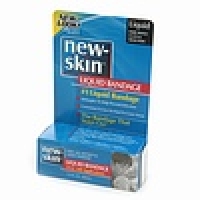
Ever since they started marketing liquid band-aids I’ve been intrigued. The concept was always so high tech and neat. The military’s been using the technology for a while now. No more problems with water, falling off, or looking funny. That said, the tech really isn’t any different than superglue. The problem was always the same as superglue. Once you opened it up, the stuff dried out and was useless. Most other brands of liquid bandaid come in single use superglue-like tubes. This stuff comes in a bottle. A bottle that can be re-used over and over again. For thousands of cuts. And trust me, it even works for cuts so bad you think you might need stitches. Yes, I’ve had to do that when I cut my finger extremely badly and I didn’t have medical insurance. Well, I still don’t, but hopefully I’ll have insurance again soon.

Over the past few years I’ve been using New-Skin liquid bandage. You would think that I would be cut more often from sharpening razors. But the truth is that I can’t even remember the last time I cut myself actually sharpening a razor. I cut myself grabbing one of my razors to be sharpened, but never while actually sharpening. No, I’m actually kind of clumsy and cut myself on stuff like broken glass and scratch myself. My accident prone self loves this stuff. It is so much more aesthetically pleasing and permanent than regular bandaids. This stuff belongs in every man’s shaving kit.

The largest advantage is that it comes in a reusable bottle. No more drying out and becoming useless. The antiseptic makes this even better. I’ve been using it to treat everything from small nicks from shaving to pretty deep wounds from being careless. To any teenagers reading this, it also works great to seal up a pimple you’ve just popped. I should note that the stuff does sting when you put it on. I feel that its the products way of telling us its killing all the cells in the area. Sort of like rubbing alcohol. Nevertheless, I prefer to stop the bleeding and sanitize using alcohol soaked toilet paper. If the bleeding persists I use a styptic pencil. The rest is common sense. All in all, for $5 this is a great addition to the first aid and shaving kit.

How to Use

Using this stuff is pretty self explanatory. However, I’ll briefly go over how I use the stuff. I should also note that this product works best in combination with a styptic pencil or alum block. First things first: stop the bleeding. If its a huge gash, see a doctor. Or if you can’t afford one, use pressure and sterile gauze to soak up the blood. For small nicks and cuts from shaving follow these simple steps: 1) Sterilize the cut with soap and water, and then a topical disinfectant. 2) Stop the bleeding using a styptic. 3) Wait for the styptic to work. 4) Unscrew the bottle, wipe off excess liquid bandaid using the lip of the bottle and apply to the wound.