Category Archives: Honing

Establishing the Bevel – An Essential Step

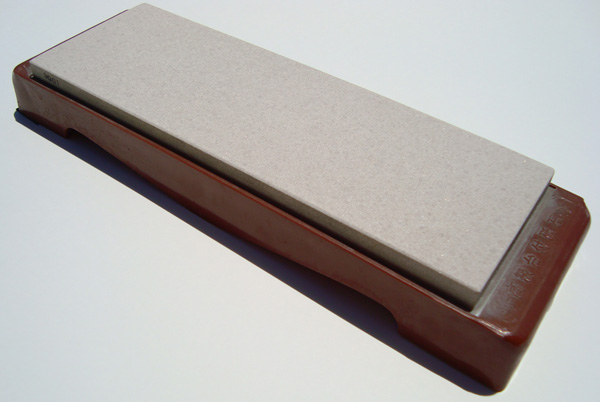
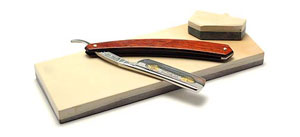
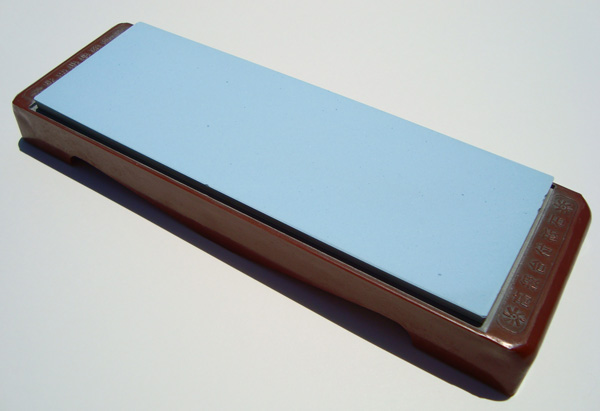
Naniwa Sharpening Stone 1000 grit

Using a 1,000 grit Naniwa Superstone, we start removing the scratch pattern left by the previous stones. If the razor didn’t need any edge repair, we start sharpening using this grit. The 1k grit stone is the foundation of razor sharpness. Most knife users declare a knife more than sharp enough off of a 1k stone. In fact, DMT calls their 1.2k diamond plate extra fine. Its been said before and we’ll say it again; where knife sharpness ends, razor sharpness begins. While I and other lifelong straight razor users can actually shave using this stone, the comfort level is extremely low. It is also extremely difficult, requiring years of practice to pull off.

The 1k stone removes very little metal if only used for a few laps. We usually start at this grit level to remove any bad steel or secondary bevels. Starting on a fresh canvas is important to our honing process. If the razor was professionally honed previously, NOS, or in excellent shape, we proceed to the next step. At this grit level, we perform as many strokes (back & forth) as necessary. For a razor in very good condition, we only do a few laps. For razors coming off of the coarser grits or with a double bevel, we do as many as 100 laps to remove the scratches left by the coarser hones or remove the secondary bevel.

Average time spent: 5-10 minutes

Cleaning & Flattening Hones – Its Annoying but Necessary

Shapton DGLP - The finest lapping stone available

Before we start honing, the honing stones must be flattened in a process called lapping. Lapping accomplishes three things: 1) flattens the honing stone, 2) smooths the surface, and 3) cleans the hone. It doesn’t matter whether the stone is natural, ceramic, diamond based, or synthetic; the hone must be lapped. We flatten our hones using a lapping plate rated at .001″ flatness over the entire length. This produces a perfectly flat honing surface.

Failing to lap the stones before each use can result in micro-chipping from surface imperfections, destroying the edge. If the stone isn’t lapped, the stone won’t be flat either, creating peaks and valleys in the surface of the stone. A perfectly flat stone imparts a perfectly flat edge. The second reason we lap our stones after each session is that lapping cleans the stones. A dirty hone is not nearly as effective as a clean hone and trapped steel particles can damage the edge we’re trying to create. It should also be noted that the lapping medium will confer to the hone the qualities of the lapping plate. For example, if you lap using a 100 grit stone, the hone will end up being very scratched and have surface characteristics of the 100 grit stone. Thus, it is important to lap extremely high grit stones with equally high grit diamond stones/sandpaper.

We have no connection with Shapton, but the lapping plate they produce is quite possibly the finest on the market. We like using it and highly recommend it. You can buy a Shapton DGLP here.

Average time spent lapping each stone: 3-10 minutes

Step 3: Edge Repair

Naniwa Sharpening Stone 220 grit

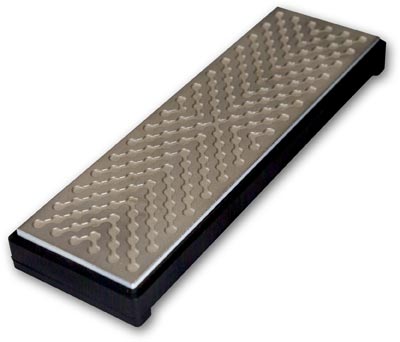
DMT Diasharp Diamond Hone Array

For razors with severe problems such as chips in the edge, double bevels, or extreme dullness, we have to completely remake the edge. We use a variety of stones to accomplish this task. From the DMT Diasharp 8×3 XXC – F to the Naniwa 220 grit synthetic hone, we have all the tools to sharpen the toughest problem edges.

This process is the longest and hardest. This process is more correctly called reshaping than sharpening. There is no lap count when we are reshaping the edge. We stop “when its done.” The goal at this stage is to grind away the edge until good steel is reached. Whether the problem is a chip in the edge or frown correction, the process and end result is the same. A lot of fine metal particles and noticeably less bevel. The process and idea is exactly like limb amputation. Some of the steel is infected and threatens the whole of the razor so it must be removed. The blade reshaped into a usable condition again.

Once enough metal is removed, its time to reshape the bevel. Removing so much metal so quickly destroys the bevel angle. It must be reshaped. Using careful strokes, we re-establish a rough cutting edge. Sharp enough for knives, but only the beginning for a razor. Once a semblance of an edge is back, we can move on to the next step.

Average time spent at this stage: 20-60 minutes

Why Good Quality Magnification is Necessary

The honing process begins with a thorough inspection of the edge. Under bright lighting, we take a look at the edge and determine exactly what needs to be done to bring the razor to shaving ready. We look for things such as: double bevel, bevel angle, hone wear, micro-chipping, pitting, or any other adverse condition affecting the edge. Once we develop a clear picture of the edge and razor as a whole, we formulate the sharpening plan.

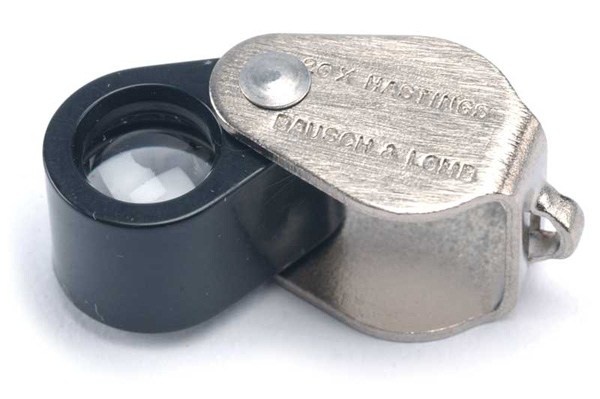
It is important to use the best optics available to get the best view of what is going on. Cheap optics do not actually give you a true picture, either distorting the picture or under-delivering on magnification. We use a Bausch and Lomb loupe because they produce some of the best lenses in the world. We use 20x magnification because it gives us an up close look at the edge, enabling us to determine exactly what the edge needs.

Finally, we set aside an hour and a half of time per razor because that is how long it can take. Usually it takes an hour.

Six Sharpening/Honing Mistakes Holding Your Razor Back

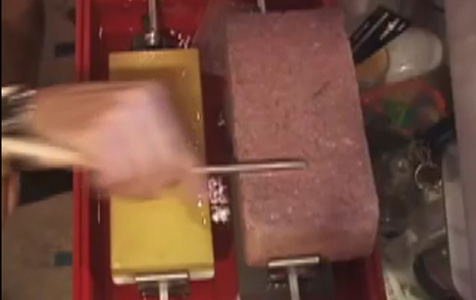
As you can see, sharpening your razor on a brick is not going to make it shave ready. Joking…. And so is the guy who made the video above. Click it for the link. This list comprises the top six sharpening mistakes. While not comprehensive, the aspiring straight razor sharpener needs to watch out for these mistakes while honing.

1. The Bevel Is not Set – The bevel is the most important part of the honing process. It is the foundation of the veritable honing pyramid. Just like the food pyramid, you have to start at the bottom, setting the bevel, then work your way to the very top when you finish the razor on your chosen finishing method. Without a proper bevel, no matter how many hours or days you spend on that 30,000 grit Shapton, your razor will never be shave ready.

2. Under Honing – Under honing is related to bevel setting, but not quite. In order to progress through the honing process, you have to remove enough metal and scratch marks from the previous stone. You have to actually affect the very edge of the razor with the stone you are using. You cannot move on to the next grit level until you have finished with the one you are currently using. Under honing is the second most popular cause of un-shave-readiness.

3. Over Honing – Over honing your razor means you honed your razor for too many laps on the stone. You’ve developed a wire edge or burr. A wire edge is worse because it looks like a real edge, but will break off the moment you start shaving, possibly into your cheek. A burr is common in knife sharpening, but extremely undesirable in straight razors. A burr means the edge has rolled over to one side or the other. Whatever the reason, the end result is the same: a less than ideal razor.

4. Unsteady Hand – Honing requires a steady hand and a steady surface. One small misstep and you can undo all the work done previously.

5. Uneven Pressure – Not only must your hand be steady, you must apply even and adequate pressure all along the edge. If you apply too much pressure to one side, or not enough pressure on another, the edge will not come out evenly. One side may come out perfectly honed, the other may still require hours more hone work to make up for the lack of pressure.

6. Finishing Method – Bonus reason. Finishing method plays a very small role, but does influence the final edge. Diamond sprays are known to give a harsh edge, while other methods are not as sharp as others. In the end, it comes down to personal preference.

There you have it. Our top five list of why your razor isn’t shave ready. We hope you put this information to good use honing your razor. So, before you go out and purchase a new hone, perhaps you might want to think about practicing honing and maintaining a steady hand while honing.

The Meaning of Shave Ready

Shave ready means the razor is sharp enough to shave. The term is a measure of sharpness. However, there is no true universal standards, actual shave readiness is dependent upon each person’s skill level and preferences.

It is widely accepted that an edge finished on an 8k stone is shave ready. Finishing stones are considered to be 12,000 to 16,000 grit. Examples include Naniwa, Spyderco UF, Chromium Oxide, and Shapton. Some people do not consider a razor shave ready until it has been honed on such a finishing stone/method. However, not classifying a razor as shave ready until it reaches such a point would be inaccurate. The term really does mean ready to shave, not “what I’d like a razor to be honed on.”

We agree with the 8,000 grit benchmark. 16,000 is nice, but we prefer our razors to be sharpened on an even finer hone.

What Makes a Razor Sharp

At the most basic level, an edge is a V (bevel). Sharpness comes from making a perfect bevel, honing both sides to a mirror finish and honing the very tip to as sharp as possible. This article will explore what it is that makes a razor sharp, a brief explanation about steel, and how we hone a sharper razor. We will explore the different types of steels, their composition, and why heat treatment forms the backbone of any sharp instrument.

Article Outline

The Steel
Stainless Steel
Carbon Steel
Heat Treatment
The Edge
Establishing the Bevel
Polishing
A Sharper Razor
Verhoeven – Experiments on Knife Sharpening

The Steel
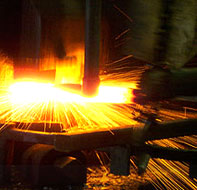
It all starts with the steel. In the beginning, there was bronze, obsidian, flint, and shells. Then came the invention of iron and with it, steel. Steel is the material of choice for tools and razors ever since it was invented all those years ago. Today there are many different types of steel, but the main two categories are stainless and carbon steel. The difference between the two is the introduction of chromium in stainless steel. This article will not go into martensite crystal formation or the technicalities about hardening steel.

Stainless Steel

Stainless steel is a misnomer, it should be called stain resistant steel. Stainless steel makes a good choice for straight razors because of its resistance to rust. Rust is the enemy of sharpness. The less your razor’s edge rusts, the sharper it remains and the less honing it requires. However, this has absolutely no effect on the initial sharpness of your razor.

Stainless steel can be a poor choice for straight razors. Stainless steel such as alloy 304, are a poor material with which to make a razor. Such alloys contain low levels of carbon and are ultimately unable to create and hold a sharp edge. Other stainless steel alloys perform more similarly to their carbon steel brethren and take a keen edge. These alloys have the added benefit of toughness and corrosion resistance. Other alloys only add a small amount of chromium sacrificing rust resistance and toughness for a sharper edge.

As a general rule, stainless steel does not take as good an edge as carbon steel, but has better toughness and corrosion resistance. The toughness consequently makes stainless steel razors much harder to hone.
Carbon Steel

Carbon steel is the oldest steel known to man. Without the addition of chromium, carbon steel rusts easier than stainless steel and requires more care. The general rule is that the greater the carbon content, the sharper the edge you will be able to achieve; up to a certain point (it also makes the steel more brittle). There are too many alloys of carbon steel to count. Silver steel and tool steel are two of the most commonly known names. Silver steel is discussed in our history of the straight razor. It is called silver steel because of the high carbon content. Tool steel is similar to silver steel in that it also has a high carbon content, but it is more modern.

As a general rule, carbon steel razors take a keener edge initially, but will go dull faster. Consequently carbon steel razors are easier to hone. It should also be noted that because of the huge amount of variation, carbon steel razors will take and hold edges much differently from each other, especially across manufacturers, model lines, and time periods.


Heat Treatment

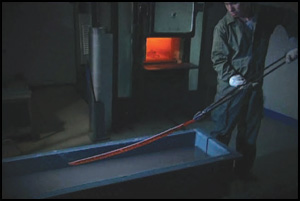
This is the most important part of the razor manufacturing process. The heat treatment turns soft steel into hardened steel. Soft steel is unable to hold an edge. It must be heat treated in order to create the martensite formations which enable edge formation and retention. Briefly explained, the steel is heated to a very high temperature, and then cooled quickly. Heat treatment is often confused with temper or tempering. Tempering is the process of taking the hardened, but brittle steel and taking some of the brittleness out at the expense of hardness. Tempering is basically just baking the razor for a set period of time in order to give spring back to the steel.

The Edge

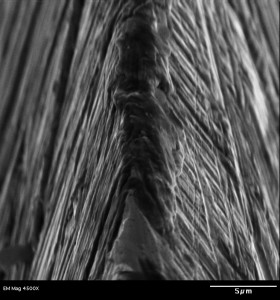
A razor’s edge looks like a V in the cross section. Close-up electron microscope photos show that the edge does not end in a perfect V, but it comes pretty darn close. Consequently, to sharpen a razor, the sharpener must establish a perfect bevel. Establishing the bevel is the most important part of sharpening/honing, whether it be knives or razors, the basic principle is the same. Sharpen the two sides until they form a V. Once the bevel is established, the edge must be polished and the jaggedness reduced or removed. This is what separates a razor from a knife.

The polishing process begins at the 4,000 grit level. A skilled straight razor shaver can shave with a razor honed with just a 1,200 grit stone, but take it from me, it is barely acceptable and your face will feel pretty raw. A razor honed on a 4,000 grit stone feels much better, but 8,000 is universally held to be “shave ready.” We don’t call a razor finished until a much finer grit is reached.

Establishing the Bevel
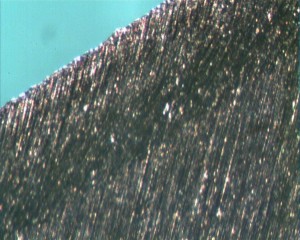
Establishing the bevel is the first part of any sharpening procedure. As stated earlier, a proper bevel should form a V. An improper bevel will instead form something similar to U or \_/. As you can see, the actual cutting edge does not form an edge. The two sides of the bevel do not meet in the center. The solution is more honing until the edges meet.

The purpose of establishing the bevel is to bring the two sides of the bevel into the center. To hone the two sides until they form a proper edge. If the edge is not formed, the razor will not cut. Without an edge, no matter how much you polish the two sides of the bevel, the razor will never shave. To make the two sides meet in the middle, the sharpener must hone away the steel until \_/ turns into \/. After the edge is formed and the razor becomes a sharp knife, the goal is to further refine the edge, turning \/ into V. The next step is known as polishing.
Polishing

Once the bevel is established, the edge must be polished. Even though the razor is sharper than a really sharp knife, the edge is not smooth, it is jagged and does not form a perfect V yet. The edge can be refined further, the jaggedness can be removed and the edge’s width can be further reduced. This process is known as polishing and involves finer and finer stones.

While a 4,000 grit edge is shave-able, most men do not find such an edge to be satisfactory. Thus, 4,000 is only the first stepping stone on the road towards shave ready. Progressing through 8,000 and 12,000, the razor’s edge is refined and given a near mirror finish. The fine grit of these stones reduces the width of the actual edge by taking fewer and fewer steel particles off the edge. The polishing process works because the steel will reflect the characteristics of the stones it is being honed on.

A Sharper Razor

It is universally accepted that 8,000 is shave ready. Most people stop at 12,000 or thereabouts and call it truly shave ready and comfortable. Some people and hone-meisters will go a step further and use diamond sprays or chromium oxide (~.25-.5 µm). These pastes do not give the same edge as a stone, but they do produce a very polished bevel. The edge given off these pastes is harsh. Probably due to the nature of the substrate the paste is put on. A Sharper Razor uses the equivalent of a 50,000 grit stone to finish your razor. Our finishing stones have been lapped perfectly flat and give you a superior edge. We put a mirror finish on your razor’s edge and go beyond shave ready.

It is our mission to continually search for the means to hone a sharper razor.
Ask ASR: Taping a Straight Razor Spine for Honing

Q: Is taping the spine with electrical tape ever beneficial or recommended?

A: We prefer to not use tape if we don’t have to. However, in some situations, tape is recommended. The spine of the razor acts as a honing guide, controlling the angle of the cutting edge’s bevel. If the razor’s spine is too far damaged or uneven, taping the spine can alleviate some of the unevenness.
Tape also proves its usefulness for wedges. Wedges were not designed to be honed with the spine on the stone (note: this conclusion is disputed). Adding tape to the spine acts as a honing guide for your wedge. It also makes the bevel smaller.
If you do use tape, make sure it is evenly distributed (see picture) and you use a high quality tape. Happy Honing!

Ask ASR: What is a Honemeister?

Q: Dear ASR,


I haven’t heard of this term before I came across your website.  It is not defined in any of the online dictionaries.  A google search just links to the same two places.  What exactly does the term mean and why do you use it?

A: Dissecting the term, the word is the combination of two words: hone & meister. Hone refers to the sharpening stones we all use to put a fine edge on our tools, knives, and razors (hence the term honing, meaning to hone (sharpen)). Meister is a German word and translates literally into master. Wikipedia defines the term “meister” in the English language as: “A person referred to as “Meister” is one who has extensive theoretical knowledge and practical skills in his profession, business, or some other kind of work or activity.” Thus, in the English language, a hone-meister would be one with extensive theoretical knowledge and practical skills regarding sharpening stones, honing, sharpening, edge repair, and straight razors.

We didn’t hear the term until the advent of the internet.  Before the shaving forums became extremely popular, the term was either nonexistent or used extremely rarely. In fact, the term honing wasn’t thrown around much back then either; it was still called sharpening. Consequently, we think the best definition of honemeister is provided by Badger & Blade: someone who sharpens straight razors professionally (edited for grammar)(link no longer working). There is no international or national accreditation or certification for hone-meisters. Consequently, anyone can hang out their shingle and call themselves a hone-meister. Simply put, the term is a word of art and is otherwise meaningless aside from denoting someone who sharpens & hones straight razors professionally or semi-professionally.  We hone & sharpen professionally, and so we use the term.  Until the English language comes up with a better term, everyone is going to use the term hone-meister.