The Most Common Honing Mistakes & How They Ruin Razors

straight razor honing mistake

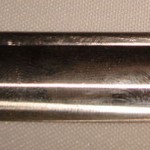
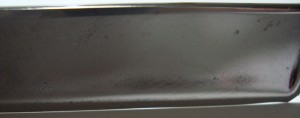
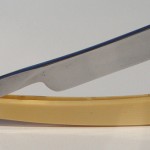
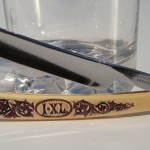
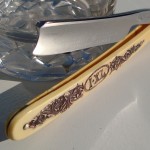
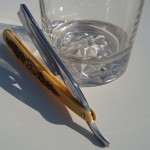
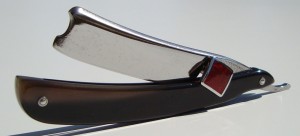
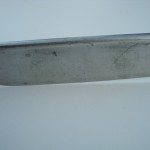
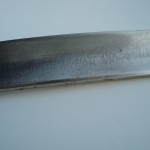
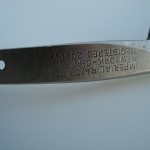
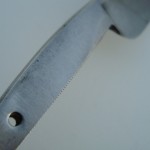
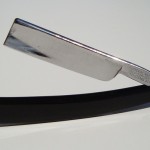
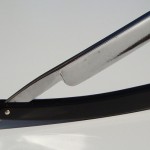
This poor razor has come to an early end due to poor honing technique


Sharpening a straight razor is no easy task. It takes skill, time, and patience. Not to mention the correct equipment. Otherwise, you end up with something like the razor pictured above. Unfortunately, it gets a lot worse. Sad, but true. So, let’s just dive in and talk about the worst honing mistakes and how they severely shorten your razor’s useful lifespan.

Excessive Toe Wear

The toe is the tip of the razor. The heel is then, the back part of the razor where the bolster is. Excessive toe wear is by far the most common honing mistake in thousands of vintage razors. Sometimes, the toe wear was intentional. In other cases, the toe wear was a result of improper sharpening technique. Let’s take a look at some examples.

As you can see, the razor’s tip, or toe, has been sharpened more often than the rest of the razor. In other words, it shows more wear & tear. The underlying problem is just that: the toe has been sharpened more than the rest of the razor. Stated in another way, the toe has spent more time on the sharpening stone than the rest of the razor.

Compounding this problem is the use of a lower grit stone than necessary. In many cases, barbers would use barber stones to re-sharpen their straight razors for their clients. These stones were not of as fine a grit as is available today. Consequently, they took off a lot of steel. More steel than necessary. Thus, the razors would be prematurely ground down to a useless level.

The toe is subjected to additional wear & tear for two reasons: 1) the user uses the toe of the razor far more often than the rest of the razor and consequently sharpens it more often; and 2) the sharpener does not have the requisite skill level to properly sharpen the straight razor.

Let’s talk about #1 first. While you may think this is not a huge problem, it is still a mistake. Not only in the honing, but also in the usage of the straight razor. Care should be taken to utilize the entirety of the blade when shaving. You should not be using only one part of the straight razor. There is a reason the straight razor is typically three inches in length. In addition, even if you did use the toe more often than any other portion of the straight razor, there is no reason you should be using it so much that the rest of the razor remains completely sharp while the toe dulls. No practical usage will do that to a straight razor. No, the reason the toe receives so much wear is improper honing technique. Which brings us to reason #2.

Sharpening a straight razor is a trial and error process. The amount of trial & errors necessary to become truly skilled is immense. Perhaps thousands of hours is required. Even sharpening your own straight razor can take hundreds of hours to master. And each straight razor is different, having a different curvature, feel, and weight.

The reason the toe receives more wear than the heel is because the sharpener failed to keep the straight razor level. This is actually very difficult. Yet, another reason why you need absolutely steady hands. The tendency is to lift the heel up as the straight razor is sharpened, concentrating pressure on the toe. Another reason is that as the razor is dragged across the stone, the heel only spends a short amount of time on the stone, the middle portion a little more, and the toe spends a great deal of time. This can be seen if you look at a typical X-pattern. If you drag the razor entirely across the entire face of the hone, the toe receives a disproportionate amount of time being sharpened. Consequently, the tip is over-sharpened.

Too much toe sharpening causes uneven wear

The Frown

The frowning razor is the second most common honing mistake. The frown is not only unhappy, but it slowly creeps up on the straight razor, making it more and more useless. The problem with the frowning razor is twofold: 1) the razor is extremely difficult to shave with, being pointed towards the toe and heel, and having little to no contact with your face in the middle; and 2) the razor is extremely difficult to sharpen for the same reason.

Take a look at this razor with a fairly pronounced frown.

This is actually pretty bad. Take a look at the spine wear (the wear on the spine from repeated sharpenings). This razor shows signs of being honed thousands of times. Yet, the toe and heel only show very light hone wear, meaning this razor has probably only seen maybe 20 years of service, yet is showing a whole lifetime of service in the middle. I can remove a slight frown of 1/16″ deflection at the deepest point, but this razor is going to take a lot of work. Its still possible to save it, but the money I would charge to do so makes the project a bad value.

Take a look at this similar razor with yet another pronounced frown.

You can see the same pattern. In this picture though, you can really see the spine wear. You see that flat area at the top, that is caused by sharpening the razor. Metal on both the spine and edge are removed while sharpening. Excessive wear in the middle. This razor is a little different because it has moderate wear at the toe and almost none showing at the heel. Let’s take a look at one more.

This razor is not as bad as the previous two. You can still see evidence of spine wear and the razor’s relative age, but the frown is not as bad. This frown is correctable. The deflection appears to be under 1/16″ at the deepest point. Our edge repair service should be able to turn this razor back into a shaving machine.

Causes

The frown is caused by excessive sharpening of the middle of the razor and not enough on the toe or heel of the razor. There are several possible culprits. One possible cause is the incorrect use of a narrow hone. If the sharpener uses a narrow stone, it extremely easy to forget about sharpening the toe or heel of the razor. Instead, the amateur razor sharpener concentrates all sharpening efforts on the middle of the razor, forgetting about the heel or toe.

Another possible cause is uneven pressure. What happens is that the sharpener started honing lightly, then as they dragged the razor across the stone, increased the pressure in the middle, and then lightened up again towards the end. Very similar to how excessive toe wear is formed, but the pressure is eased up on the end.

Yet another possible culprit is not enough time on the stone. This happens if one starts honing with the heel off of or almost off of the stone and immediately drags the heel of of the hone, and at the same time also ends the stroke early. Ending the stroke early means the toe isn’t sharpened as much.

As you can see, these problems are compounded by the fact that the middle will become sharper much quicker than the toe or heel. This further induces the amateur sharpener to continue sharpening and further exacerbating the problem. He will try to compensate for the lack of sharpness by doing more laps and removing more metal. While the toe and heel will eventually become sharp, the sharpness comes at the expense of lost metal in the middle.

The next honing mistake is a unique combination of two frowns.

The Wavy Edge

An odd name to call a honing mistake, but there really is no other way to describe it. The edge is wavy. Essentially, what happened is that the sharpener managed to add two frowns or a frown and excessive toe wear to his razor. Let’s take a look.

As you can see from the two examples, the wavy razor is just that. Wavy. The top picture shows a frown combine with a toe that curves upwards. You can see the tell-tale signs of excessive toe wear on the spine and in the way the edge curves upward. The second picture shows you a frown in the middle hidden by what appears to be a slightly smiling razor.

In the first example, the end result is caused by simply combining excessive toe wear with a frown. In the second example, you think that the razor is smiling, but in fact, the razor has a frown in between the smile. This is actually quite common because honing a smiling razor is extremely difficult and many people try and fail to hone them properly.

Let’s take a look at a double frown.

Click for animation

As you can see, this razor has two frowns. This is extremely rare and I actually don’t have my own example so I had to borrow one from coticule.be to illustrate the honing mistake. Click the picture to see an animation displaying the two frowns. This is caused from poor honing technique. This probably happened because the razor has/had a slight smile in the beginning. Over time innumerable honing mistakes caused two frowns to be formed. Another possibility is that this was caused by using a narrow hone and sharpening the razor in sections. The cure is to learn to hone properly. Double frowns are so extremely rare that here really isn’t much more I can say on the matter.

Straight Edge on a Smiling Razor

Some razors are meant to be curved. Other razors are meant to be straight, but people put a smile on them. While this isn’t bad per se, you are putting unnecessary wear & tear on the razor and making it do something it wasn’t designed to do in the first place. The honing mistake is when someone hones a smiling straight razor the same way as a straight edge. Even worse is when they make it into a frown! Check out the pictures below (they actually show a smiling razor with a frown being corrected, but they illustrate the point nicely).

The straight edge on a smiling razor is a problem because it defies the natural curvature of the razor. If you try to sharpen the razor like a straight edged razor, you will end up with a frown. Perhaps the razor will go straight first and then start frowning, but the end result is the same. You get picture #2.

The reason is simple. The curvature of the spine causes the middle of the edge to touch the hone more often than the rest of the razor. Consequently, if you hone the blade normally, you will remove more metal from the middle and very little from the edges. Compound this problem with the exacerbation of not being able to get the toe and heel sharp, and you have excessive honing of the middle. This quickly becomes a frown as you continually remove metal in the middle trying to get the toe and heel sharp.

Excessive Heel Wear

This is the last example. Take a look at the picture illustrating the problem. Notice a frown in the heel? You can also see another small frown just left of the heel as well. Click the image to enlarge it and you’ll also notice that the toe of the razor is exhibiting much more hone wear than the heel. Clearly this razor is suffering from a number of problems, but let’s concentrate on the heel wear. As you can see, the heel was sharpened a lot. In fact, the heel would be ground away into a smirk if not for the bolster that got in the way. In addition, that frown just to the left is not looking good.

How the heel happened is simple. The person sharpening the razor couldn’t get the heel sharp enough to his liking and just sharpened the small area constantly until it was sharp enough for him. The bolster got in the way and he created a small frown or dent in the edge. What he should have done was ignore the bolster. In some cases it is just not possible or practical to make 100% of the edge shave ready. This is one of those cases. The bolster is just that, a bolster. It is not meant to be sharp. It’s there to protect you. Just like the bolster on forged kitchen knives.

Conclusion

There are a few more honing errors visible on many razors on ebay. Most of them involve honing a razor beyond its useful lifespan or trying to hone the bolster, but failing. But these are the top four.

To get your razor professionally sharpened and avoid any of these errors, go to our services page.

Our Cleaning Service Overview

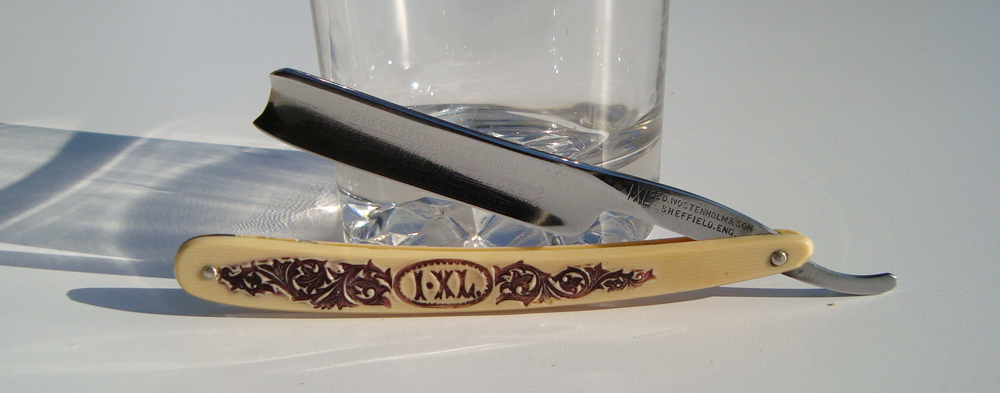
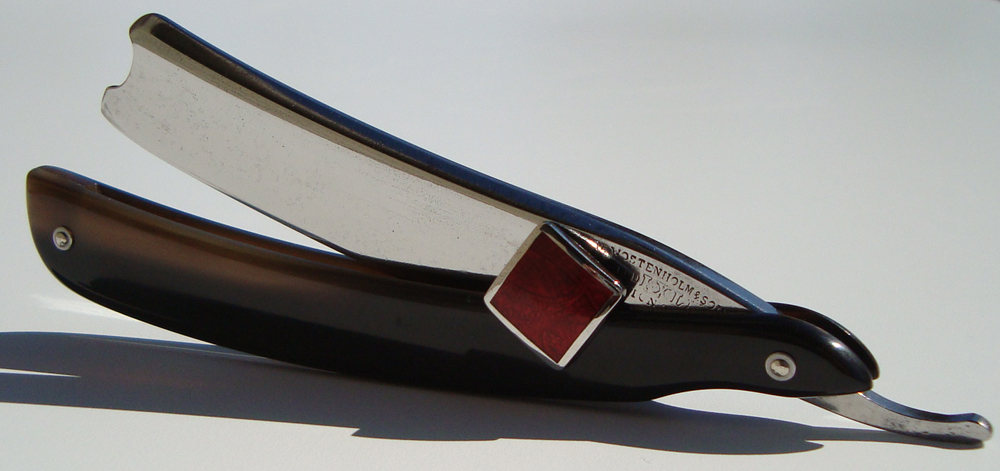
Some razors don’t need a full restoration. Some razors only need a quick polish. Today’s candidate is a Geo Wostenholm with ivory colored plastic scales. If you click on the pictures to enlarge them, you will notice that the razor is in very good condition, relatively speaking. The scales are dirty, especially on the inside and the blade is very tarnished with some very very light rust. In addition, the blade suffers from some scratches undoubtedly obtained somewhere along its long lifespan.

Since the razor’s only major blemish is tarnish from years of neglect, this razor makes a good candidate for our cleaning service. Any worse and it would need a restoration. The razor is actually relatively clean and suffers from no visible chips in the edge. A great candidate for cleaning. Although a restoration could remove the scratches, in this case they weren’t visible enough to worry about.

We start by washing the razor to remove any dirt and surface debris. Then, we polish the razor on a buffing machine using special polishing compounds. These compounds remove the tarnish and any leftover dirt and grime. Next, we thoroughly clean inside the razor and around the pivot point. This is a delicate process, so we do it by hand. Finally, we sharpen the razor. The end result is a damn shiny and shave ready razor!

Debunking Pyramid Sharpening/Honing: The Secret They Don’t Want You to Know

So, many people ask me about honing razors and invariably ask about the pyramid honing method popularized by Lynn Abrams. I covered it briefly in my Beginner’s Guide to Honing, but haven’t really tackled the subject since posting the guide. Now, I’ll admit, I have completely ignored sharpening razors on the blog other than the my honing process series. In this article, I will tackle the most talked about honing method to date: pyramid honing/sharpening. I’ll show you why your wasting your time and how you achieve the same results with 1/2 as much effort.

First off, lets start by defining what pyramid honing is. Well, pyramid sharpening of razor blades involves putting your razor inside of a pyramid. Now, it’s obviously important to use the correct pyramid, ie of copper, etc. Okay, now that you’ve got the razor inside the pyramid, all you have to do is leave the razor inside the pyramid for a day or two. The pyramid will use magnetic fields to re-sharpen the razor. So, using the power of pyramids, you can straight razor shave for very cheap.

Okay, on to the debunking: Mythbusters has already debunked this myth, so I won’t go through the trouble.

JUST JOKING!!!

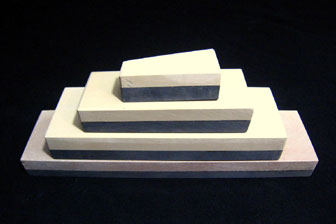
That is not pyramid honing. Pyramid honing is the honing process popularized by Lynn Abrams and Straight Razor Place. It is called a pyramid because the honing method resembles a pyramid. It resembles a pyramid in that the first level requires a lot of strokes or laps, then the next level reduces the amount of laps, and so forth until you reach the top of the pyramid where you only do a few laps on the stones.

The pyramid honing method requires two grits of sharpening stone. A 4k stone and an 8k stone. This is important for reasons I will elaborate upon further into the article. For now, you’ll have to trust me that it won’t be as effective with a different combination of grits. Now, the goal of the pyramid honing method is to get yourself a shave ready straight razor with a minimum of effort and skill. To give credit where credit is due, the pyramid method does actually achieve a shave ready razor with a minimum of knowledge and skill. However, the pyramid method is highly inefficient. I’ll show you why in a little bit. First, let’s look at what exactly the pyramid method is. The pyramid method requires the straight razor aficionado to do a certain number of strokes or laps on the 4k stone, then a certain number of laps on the 8k stone. The user then repeats the process until he/she ends up at the tip of the pyramid and does 1 4k lap and 10 or 20 8k laps. A lap is two back and forth strokes on the stone. One for each side of the edge. I will use strokes and laps as synonyms in the rest of this article.

So, for example’s sake, let’s look at a typical pyramid honing plan. At the bottom of the pyramid you can see that you do a lot of 4k laps and very few 8k laps. Then they even out in the middle, and finally at the top, the number of 8k laps vastly outnumbers the number of 4k laps. Here is a pyramid honing plan taken from SRP:


Strokes on 4k Strokes on 8k
25 25
20 20
15 15
10 10
5 5
3 3
1 3
1 5

The truly interesting thing about the pyramid is that you can customize it to fit your needs as well. The above pyramid is highly inefficient. There is absolutely no benefit to doing 25 8k strokes on the base level. Here is my suggested pyramid if your interested in actually pursuing this method of honing.

Strokes on 4k Strokes on 8k
20 1
15 1
10 5
5 5
3 3
1 5
1 10

As you can see, I’ve cut out the excess 8k strokes. Why did I cut out those strokes? Because they’re a waste of time!!! Let’s think about this logically, if the point of honing is to remove the prior scratches from the coarser stone, why the heck would you go back to the coarser stone? It is exactly the same principal used in sanding and metal polishing. You remove all the scratch marks from the previous grit and then move on to a higher grit. Sharpening a razor is no different. The end goal of the pyramid is to replace all the 4k scratches with 8k scratches.

Now, am I saying this method does not work? No, absolutely not. It clearly works. Look at the end result. The end of the pyramid has you honing only once on the 4k stone and 5x-10x on the 8k stone. Doesn’t that seem like a little low you might ask. Yet, the answer is surprisingly no. While the 4k stone may require a large amount of laps or strokes, if you are skilled and don’t mess up the edge, the 8k stone only requires a maximum of 20 laps in most cases. Some razors require more, but that is getting into advanced honing topics. This is still Honing 101.

In the rest of the article I will explain first, why the pyramid system works, and then I will explain how it is actually inefficient.

Why Pyramid Honing Works

Pyramid honing works. Don’t ever quote me as saying it doesn’t. It truly works. It is also a very simple formula for beginner’s to follow. Let’s first examine why the SRP wiki pyramid works. Our analysis will also take into account that the 8k strokes are completely voided by five or more 4k strokes. After 5 strokes on a significantly lower grit, all you’ve done is put back the scratch marks of the lower grit. Again, a topic for Honing 200. So, our analysis starts by removing all mention of 8k laps in the first half of the pyramid.

If you remove all the 8k strokes, your left with the following: 25+20+15+10+5 = 75 strokes on a 4k stone. That is 75 strokes just on the 4k stone. Now, the SRP Wiki article would also have you honing the same number of strokes on an 8k stone. So, if we add that in, that is another 75 strokes. Now, don’t think that the 8k strokes don’t do anything. They do. They remove a small amount of metal. However, they’re the functional equivalent of 1:2 or 1:4 4k:8k ratio. Said differently one 4k stroke removes the same amount of metal as 2-4 8k strokes. But I’m getting ahead of myself now. I’ll come back to this in the next part.

So, that is 75 strokes only on the 4k stone. That is a hell of a lot of strokes. Keep in mind your being told to do even more after the midway point. So, that is 75 strokes on the 4k stone. Of course, the razor will be sharp after 75 strokes on a 4k stone. A 4k stone is pretty darn close to shave ready. I call it shave-able if your skilled enough. But let me explain even further why 75 strokes will get that razor damn near shave-ready.

The untold story behind the pyramid plan is that you need to have a bevel set. This means you need to have prepared the razor, or have a razor that has already been prepared. Typically a bevel is set using a 1,000 grit stone. You can’t exactly shave with this grit, but it’s possible. Don’t do it. Just realize it’s possible. A typical progression after the 1k stone is to do X laps on the 4k stone until the razor is ready to move on to the next phase: 8k. Now, I can’t tell you exactly how many laps you need to do because it depends upon your skill at honing and the stone your using. However, I can tell you that 75 laps on a 4k stone is plenty enough. In fact, if you add in the extra 10 or so more 4k laps, it is definite overkill.

But You Just Said that the 4k Stone Undoes the 8k Laps

Yes, I did; and I’ll explain why the pyramid scheme still works. Okay, so the razor is now shave-able half way through the SRP pyramid. So, let’s move on and examine the second half of the pyramid. Actually, let’s just skip to the final two steps. The final two steps are 1 lap on the 4k stone, 3 on the 8k stone; and then 1 4k and 5 8k laps. Keep in mind that just before these final two steps, you were required to do 3 8k laps just before. So, let’s add up the number of 8k laps: 3+3+5 = 11. That is eleven laps just on the 8k stone. Compared with only two 4k laps, the 8k laps clearly win out. Now, while it is certainly true that the 4k undoes the work of the 8k stone, only one lap isn’t that bad. Even if the 4k stone erased all of the 8k stone’s work, your still left with 5 good and uninterrupted strokes on the 8k stone. While not ideal, your razor is still shave-ready.

Now, let’s look at my pyramid scheme: That is a total of 15 8k strokes, to only two 4k strokes. In addition, you finish with 10 strokes on the 8k stone. Now, I’m going to give away a secret. 10 strokes on an 8k stone is all you really need if your truly skilled at honing. So, even if that 4k stroke messes up the 5 strokes in the second to last level, the 10 final strokes makes up for it. So, in the end, you have a shave-ready razor off of the 8k stone. Voila! It works! Yet, it’s incredibly inefficient. I’ll show you why shortly.

First I want to go back to the bevel setting. The #1 problem people have with honing their own razors is not enough prep work. They simply have no idea what they’re supposed to be starting with. The pyramid method works best if you have an already sharpened straight razor that you’ve been using for 12 months and want to re-sharpen it. OR if you have a factory sharpened straight razor from Dovo or TI have shaved with it a number of times, but it has gone dull. In both cases, the bevel is already set and you need do no more.

Contrast with buying an ebay junker and attempting to hone it yourself. The pyramid method is not ideal and probably won’t even work. Also contrast with a razor you’ve breadknifed to erase a frown or chip. The pyramid method WILL NOT work. Period. Well, it can, but you’d be masochistic to even make the attempt. So, now that you know the limitations of the pyramid method, you can see that it actually does and will work.

Pyramid Honing is Inefficient

On to the meat of this article. Pyramid honing is inefficient because you are going backwards every single step of the pyramid. The obvious question you should be asking yourself at this point is: “Why am I even bothering with the 8k stone?” Exactly. Your wasting your time. Yes, the 8k stone removes metal, but think about how much more metal you would be removing if you just stuck to the 4k stone. Instead of doing five 8k laps, you could replace all of those laps with only one 4k stroke. The math is truly that simple.

Let’s face the reality of over-doing the 4k laps as well. 80 laps on the 4k stone is excessive. No razor should require that many laps. 50 is the most I’d say is necessary. So, your doing 30 more laps than required. That said, your bevel might not be perfectly set and the extra 30 laps could ensure a proper cutting edge. That said, even if you do 80 laps on the 4k stone, your not being terribly inefficient. The inefficiencies lie with the 8k laps.

SRP Wiki would have you performing 75 total laps on the 8k stone and then immediately wipe out your hard work on the 8k stone by using the 4k stone. Now that is just pointless. As I’ve said above, any laps done on the 8k stone before the final steps are better spent on the 4k stone removing more metal than the 8k stone.

But you said it works right? Why does it work?

Yes, I did. It is also highly inefficient, making you do extra work for no purpose whatsoever. The pyramid method works because it presents the new straight razor sharpener a plan for getting his/her razor to sharp. If the razor is not shave ready after utilizing the pyramid, the response is to do the pyramid over again. Once again, your wasting your time. If the razor is not sharp enough to shave after 80 laps on the 4k and 80 laps on the 8k, send the thing to a professional. Your bevel was clearly not set properly, or you fucked it up.

The pyramid does not undo what you did with the 8k stone because in the end, you finish on the 8k stone just like a normal progression. While the number of laps on the 8k stone may be pretty small considering you just wiped out a lot of 8k laps by going back to the 4k each time, five good laps is enough to get a shave ready edge. Especially if you consider that it’s really only one 4k stroke in between three laps on the 8k and then five more.

My pyramid is more efficient because it puts all the 4k work on the front end and requires almost no 8k strokes until the end. Then the final 8k laps are limited to ten, the correct amount.

But doesn’t the pyramid prevent over honing?

No. There is no such thing as over-honing. A wire edge is formed because of poor technique, not doing too many laps.

No, the pyramid technique is not going to fix that problem either. A normal honing progression limits the number of strokes on the 8k stone. You shouldn’t be doing more than 20. If you do more than that, you need to work on your technique or buy a better stone. In addition, even if you do more than 20 laps, your not really going to cause any problems unless you use too much pressure in the wrong places.

The idea that the 4k stone will erase the wire edge is true. It will. But to create a wire edge, even when using incorrect pressure, requires many strokes on the 8k stone. This is because the 8k stone removes so little metal.

If you are creating a wire edge off of the 4k stone, the pyramid method will not help you. Honing on a higher grit stone is not going to remove the wire edge effectively. At best it will just break it off and leave you with a dull edge. You still have to go back to the 4k stone and fix the problem.

So what should I do?

You should just learn to hone properly. Use a traditional and time tested progression. Do enough laps on the 4k stone to get it prepared for the 8k stone (remove the scratches from the previous stone or get the radius as close to zero as possible). Then move on to the 8k stone and limit the number of laps. Do 10 then shave. Do 10 again, shave again. If you can’t get it shave ready by then. Go back to the 4k stone. Repeat.

As you can see, while the pyramid system works, it is grossly inefficient. Even my own improved pyramid plan is inefficient. Your time is better spent sticking with the 4k stone until your done, rather than flipping the stone over or bringing over the 8k stone and moving the 4k stone aside. Your just wasting time.

Last word. All that said, it does work.

Razor Restoration – Going from Rusting to Amazing

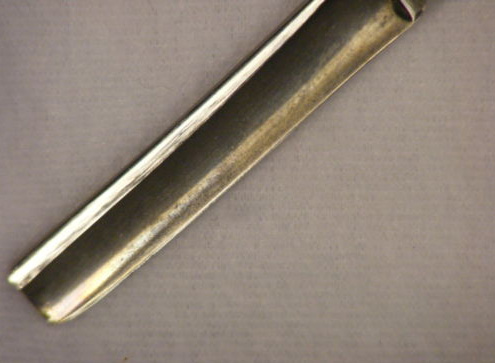
The following is an illustrated tour of how we restore a straight razor to near mirror finish. We start by sanding away any rust and oxidation that is on the blade, bringing out the clean steel underneath. We then polish the razor on an industrial buffing machine using buffing wheels & compounds to bring out the shine and luster trapped underneath all the grime. Finally, we polish the razor by hand to clean away any debris and remove any swirls left over by the buffing process.

Our buffing process does not completely remove pitting. In order to completely remove pitting, extreme sanding is necessary to grind away the metal beyond the pits. This process adds considerable time to the restoration process. In addition, unless an even inordinately larger amount of time is spent removing every single scratch mark, the razor will be left with grind marks. We do not currently offer this service because it is so time intensive that the cost would be prohibitive. We will review this decision if we receive enough requests for such work.

WARNING! A buffing machine is the most dangerous machine in the shop. If you use one always wear eye protection and a breath mask. Only work in highly ventilated areas.

Razor in Original Rusted Condition

Here is the razor in its pre-restoration condition. We wiped it down a little to get all the surface dust off. As you can see, the rust and oxidation was pretty extensive. The rust was allowed to build up quite extensively in some areas. You can see that pits had already started to form throughout most of the face of the blade. All in all, this razor was not in bad condition. The razor will turn out nice and shiny, albeit with shiny pitting.

Razor After Sanding

We use 600 grit sandpaper to scour away the rust and tarnish. You can see the steel beginning to come out. Its even starting to shine a little. While you can’t see a reflection in the steel at this stage, you can start to see what the final product is going to look like. As you can see the scratch marks are in a vertical pattern. This is to ensure that if any scratch marks are left over after the final polishing stage, that they match the factory grind marks already on the razor. We clean the tang, including the jimps, and the blade during this process. You can really see the pitting in these shots. The black grime in the pits and crevices is actually steel and abrasive that was ground off the surface of the razor. They will disappear after the final polishing stages.

Razor Midway through the Buffing Process

The next step is to buff the razor using an industrial strength buffing machine. The first part of buffing is to remove the sandpaper scratches. A cutting compound is used to remove previous scratches from the steel. This process takes half an hour or more to get a good finish and remove all the sandpaper scratches. The sun was setting when the pictures were taken, but you can see the shine starting to come through. The finish is a duller, matte finish, but the razor is a lot shinier than when it started. You can even see yourself if you shifted the razor in the right direction. It was blurry, but it was reflecting. You can also see fingerprints all over the blade from handling it for the photos. There was still compound left on the blade.

Razor After Final Polishing

This is the final finish. You can see the camera being reflected quite clearly even though it is far away. We could have done the reflecting text thing, but we chose not to. In these pictures you can see the true extent of what we can accomplish. All the pits are clearly present. As said above, we don’t remove serious pits. You can even see some marks from sanding or a tool mark from a prior owner. Because the razor is so polished, every single imperfection is magnified for you to see. You can also see yourself in the razor. The finish is a near mirror finish on the steel. However, the severe pitting throughout the surface of the razor ruins the mirror effect by distorting the image. The mirror effect is much better in the tang where the razor suffered less damage. You can see a better example of our polishing on this razor which started with much less pitting and corrosion.
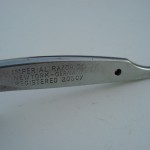
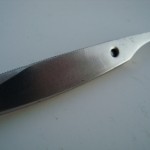
This razor isn’t quite done. It still needs to be re-shod in new scales. We’ll take more pictures then and post them in this article. But that’s it.
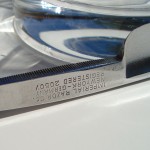
Update: The razor is finished and the pictures have been taken. The final steps were to mount the razor in its new scales and do the final polishing by hand. As you can see, the results were fantastic!

Mitchell’s Wool Fat Hard Shaving Soap – The Review

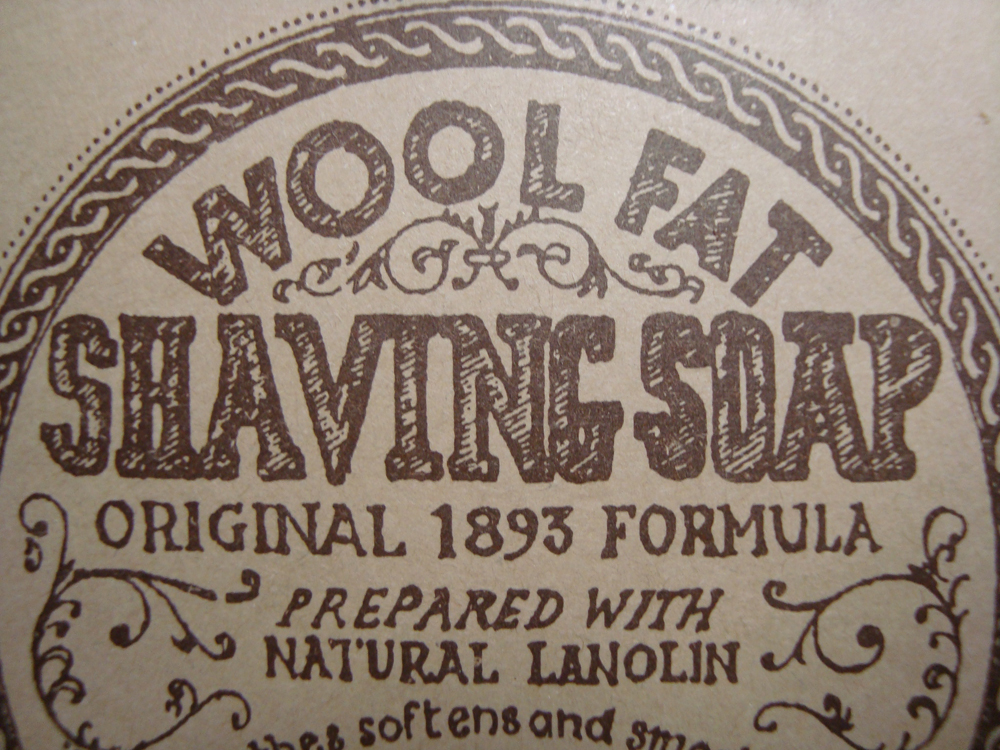
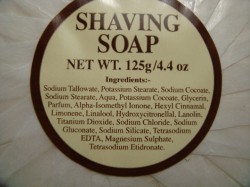
Mitchell’s Wool Fat (MWF) is probably the most talked about and recommended  hard shaving soaps within the wet shaving community, not only because of its unique moisturizing properties (it contains lanolin, hence the name), but because there are so many different experiences in getting it to lather properly. Some have no problems and consider it to be the gold standard of shaving soaps; others say it just won’t lather. This article will introduce you to MWF if you haven’t tried it, give you advice on lathering and loading the brush, and let you know my thoughts on this exceptional soap. Plus, its still made with tallow!

Want to win a puck? Keep reading.

If you decide to splurge on this soap, it comes in a beautiful ceramic dish. A great picture of it is found on Shaving 101’s blog. Now, I personally did not splurge on the ceramic dish for two reasons: 1) I’m not flush with income from this website or income in general; and more importantly, 2) every single tallow soap combination bowl/soap package contains a bowl that is non-functional. Now, don’t get me wrong, the wooden bowls look amazing. So does the MWF ceramic bowl. The Tabac bowl could use a little design work, but seeing as it costs much less, I’ll give it a break. Glycerin soaps on the other hand, come in very functional water and air tight plastic containers. They look cheap, are cheap, but work! Now, they are able to come in these containers because glycerin soaps are simply poured into the container. Tallow soaps are triple milled and rolled. So, now that you’ve read all that, here is my simple solution I published in an earlier post. Use pyrex cups to store your soap.

Using this simple solution not only saves you money, but it prevents this problem outlined by Bruce, from Bruce on Shaving:

“The thing about MWF is that it doesn’t do what other soaps do, it acts almost as if it is a living thing. Use it on consecutive days and it gets better and better, as if it appreciates the attention. Leave it for a week and it will have a sulk and try and give you a bad time. Left for a while it becomes a loner, forming a hard skin round itself. Too long and cracks appear in the surface as it displays its displeasure.”

Scent

The smell of MWF is interesting. At first scent, I really wanted to say it smelled like Tabac. When I put the Tabac puck up to my nose to check however, the difference was strong. The better description would be traditional smelling. It smells very “old school.” One person described it as “typically traditional….perhaps hints of Lavender,Geranium, and of course the Lanolin. It’s non seasonal….you can use it all year round.” A better description is by Russel Chozik, “It has a great powdery, fresh scent that is very natural and pleasant smelling.” After spending more time with the soap, I would say it smells like tallow, if tallow had a scent that is. It has all the base notes found in D R Harris & Tabac soaps. Now, I’m no scent expert, so I really can’t tell you what exactly the base note is, but its common in all tallow soaps I’ve tried unless masked by lavender or other strong scent.

Either case, other than the passing resemblance, MWF smells nothing like Tabac. It is crisp, clean, and subtle.

Loading

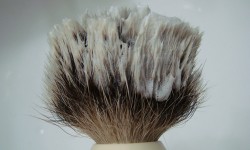
The loading process is not as easy as I would like. I must be spoiled off of Tabac, GFT, & DRH. Here’s the trick to loading it: use a dense brush. No, really, it really really helps. My Semogue really hates the stuff. It won’t stick to the loosely packed bristles that well. Don’t get me wrong, I still get a good lather in the end, I just have to work harder at it. On the other hand, my Shavemac & Simpson loaded right up. Very easy, although it took a little longer than the other soaps mentioned above. Must admit, a few times I was afraid I overloaded the brush. But alas, not so. This stuff just does not want to load easily. So minus a star for that (okay I don’t use stars in my reviews, but if I did…)

It took me about 30 seconds to get it that loaded

Lathering

There is only one easy way to lather this soap; face lathering. Bowl lathering makes it finicky. You can bowl lather and get good results, but you must realize that most of the glowing reviews are based off of face lathering and/or soft water. Many people have problems lathering this soap. The biggest culprit is of course, hard water. This is where using filtered/distilled/RO water for lathering really shines.

For my regular readers, you already know I face lather. I just feel it’s the best way to lather. It is also the preferred method of lathering this very famous soap. Now, if you want to lather it in a bowl, Shaving 101 has a suggestion:

“Use a very well wrung-out brush. First load the soap into the brush then add water very slowly while building the lather in a bowl. This works well, but can take a while.”

Now, I haven’t tried this method. I didn’t have to, but its there if you have trouble bowl lathering. MWF face lathered well for me. Like the loading process, MWF did not lather quite as easily as my other soaps. Maybe I’m spoiled, or maybe they’re better, I don’t know. Either case, it took a while to face lather to a good consistency.

MWF does not like a lot of water. Use too much water and unlike other soaps, MWF will dry out on you faster than you can shave. Okay, not that fast, but faster than it took me to shave 3/4 of my face. It was pretty picky about lather consistency. Build it fairly thick so that its not too transparent and it will stay wet and slick for you.

I had to spend considerable time building a good lather compared to Tabac or GFT. Usually I only have to dip the brush once before I start face lathering to get the correct consistency. With MWF I found it better to dip very very lightly the first time, lather, dip lightly again, and lather more. Repeat until you get the consistency you want.

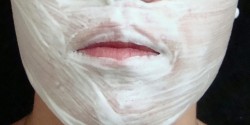
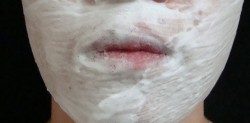
While MWF works fine if you leave it a little more watery, it also works great when extremely thick and rich. I’ve tried it from pretty darn transparent to Santa Claus thick. The performance was great no matter how thick or thin the lather was. That said, if you try to shave with a thin MWF lather, you had best shave ultra quick because it will dry out really quickly. Its almost like shaving with water. So, I recommend building up a moderate lather with MWF for best results.

Check out the photos below.


Left shows a nice and thick lather, right shows a little less thick lather; good for the final pass.

Performance

You may think I was going to give this soap a bad rating after reading all that talk about how much more time it takes to lather with MWF. I’m not. While MWF may have its faults, they are mild and it is an excellent performer. The lanolin and tallow moisturize the skin well. If you leave the lather on your face for an extended period of time you will be either rewarded, surprised, or both by a unique cooling sensation. It reminded me of menthol. The sensation is subdued if you shave quickly. The cooling sensation continued for a good while after the shave, leaving my face feeling refreshed and moisturized. I don’t think my face has felt so clean and fresh after a shave! That said, I still recommend an SPF facial moisturizer after you shave. The sun being evil and all.

Now, lets talk about MWF and slickness. I like my lathers to be slick. I also like my lather to provide cushioning. I want the razor to feel like a hovercraft shaving my face. Hence, my preference for tallow based soaps. Let’s talk about the slickness first. MWF is slick. I was surprised at how slick this lather is when it is thick. See picture 1 above. The soap really retains a lot of water in the lather. Shaving with MWF is a joy. The cushioning can be hit or miss however. If you lather MWF thick, the cushioning will be there, but if you don’t you’ll find that the lather can be pretty similar to shaving with water. Really slick, but unforgiving.

All in all, I love Mitchell’s Wool Fat shaving soap. It is staying in my shave den/kit. I definitely recommend this soap to anyone looking for a tallow based soap or an excellent performer. I wouldn’t recommend this soap to those who bowl lather using hard water.

If your interested in this soap, you can purchase a puck below.

Mitchell’s Wool Fat Shaving Soap Refill

I thought you said I could win a puck?

That’s right, I did. You can win 1 of 2 pucks!!! Here are the details.

  • You must have a Facebook or Twitter account.
  • Entries are limited to the first 50 (1/25 chance of winning!) entrants, winner will be announced December 1st.
  • To enter the drawing, click the button below to share with your friends and enter the drawing.
  • You will be taken to an external site.
  • We need your contact information so we know how to reach you if you win.
  • You will not be spammed. I promise. The only future emails you will receive will be about future freebies.

Sponsored by:


Ask ASR: Where Should I Buy a Shave Ready Razor from?

Q: Who sells shave ready razors? Why don’t you have any razors for sale?

A:

If we look at the straight razor retailer market as a whole, you will find that in fact, very few retailers have the ability, nor do they offer shave ready straight razors. While they may be advertised as sharp, there is a difference between factory sharpened and shave ready. The wet shaving community defines shave ready as at a minimum sharpened on an 8k stone by a skilled hand. A factory edge may or may not be at this point, but the edge can be much better. A few retailers either sharpen their own razors in-house or send it out to someone for sharpening. The rest simply rely upon the factory which is hit or miss. In the case of Fromm and that other brand whose name escapes me (also from Solingen, but not Dovo) the result is disastrous.

Simply perusing the internet, you’ll find that the biggest names don’t offer shave ready razors. I am willing to surmise that most Americans buy their razor from Art of Shaving, the Knife Center, or their local cutlery store. Then, they try to shave with it, find out that the edge is mediocre and learning to shave with a straight razor is hard, and quit. The good news is that there are still a few stores out there who advertise shave ready razors. If your in the market for a new razor, Classic Shaving, Straight Razor Designs, Hart Steel, and Vintage Blades LLC all advertise shave ready razors. In the EU, you have The Invisible Edge and Rasurpur. Doing a google search reveals that Classic Edge also offers shave ready razors. That said, I’ve never heard of them until just now. Of course, they can’t spell professionally, but I’ll cut them some slack for at least offering the service. And that is all the retailers in the US I know about.

Now, if your in the market for a vintage razor, there are several people selling shave ready vintage blades. That said, I have no personal experience with any of them. As for why I don’t have any razors listed on this website, its because I sell my restored straight razors through Razor Emporium. In addition, there are always the for sale sections of straight razor forums.

Related Q: Do I need to buy a shave ready razor?

This answer is more nuanced. If you can help it, I highly suggest buying a shave ready razor. Learning to shave with a straight razor is hard enough. You shouldn’t have to wonder if your blade is sharp enough. Buying shave ready will eliminate that variable from the equation. Now, that said, the truth is that Dovo and Thiers Issard try to make sure their razors are shave ready from the factory, finishing their razors by hand on wetstones.

While they may do their best, they are still mass manufacturing straight razors. Mistakes happen. In addition, while the razor may be shave ready from the factory and packed in oil, it could be months or years before the razor finally gets to your door. Keep in mind that they have to be shipped over a large ocean filled with salt water. Not the most hospitable environment for your straight razor.

While the journey seems perilous modern technology and transport is at hand to make sure the razors survive the trip in their original condition. Nothing can be done about a razor being in storage for two years, the edge is not likely to be as good as when it was fresh. But for the most part, its unlikely you’ll get such a razor. In addition, the razor should still be sharp.

If you have questions about whether your new razor should be sharpened, we’ve answered that.

For the most part, Dovo, TI, and Wacker razors are sharp enough to shave. I personally would refinish the edge, but I’ve got a lot of stones and skill at my disposal. Yet, that should not dissuade you from purchasing a non-shave ready Dovo, TI, or Wacker (you shouldn’t buy a non-shave ready Fromm or Mehaz or Gold Dollar or anything from Pakistan) (actually you shouldn’t buy anything from Pakistan).

If you do buy a non-shave ready razor, the worst case scenario is that the razor was sharp, but not quite shave ready. You got to use it a couple of times. And now you know what the difference between shave ready and not really is. This is actually a good benchmark to have as you now know when you need to re-sharpen the razor.

Of course, if you can find the same razor for the same price and shave ready, buy that razor. There shouldn’t be any question. But if the price difference is more than $20 (cost of our re-honing and two way shipping), then you might want to weigh your options.

How to Shave Like a Man and Combat Acne


This article is a continuation of our two part series: The Ultimate Guide to Shaving with Acne. This section covers the actual shave and post shave steps to help prevent new breakouts. Read part 1 here.

After excellent beard prep, it is time to actually shave. Having ditched the multi-blade cartridge, it is time to pick up your new straight or double edged razor and shave. Follow our advice below and you will combat new breakouts and have better skin.

The Actual Shave

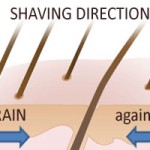
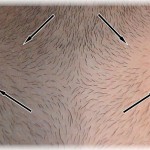
Regardless of the source, all experts agree only doing a with the grain pass is recommended. Now, if you want a closer shave than this, don’t go further than across the grain. If you decide to forgo my advice, shave against the grain at your peril. A single pass is good enough for most teenagers. Adults with acne may decide to shave against the grain if you only have a few pimples. If you don’t know which direction your hair grows or what against/with the grain means, consult the below picture.

After the beard prep stage, it’s time to lather. If you decided to try wet shaving, you may think about lathering before you lather. Meaning, lather your face, wipe it off after five minutes, and lather again. This allows the lather to soak into the skin and soften the hairs even further. If your having trouble shaving comfortably or closely, then try this method.

If you only have a few pimples or a mole, then the simple solution is to not shave the area. Same goes for serious breakout areas. Just don’t shave it. See a dermatologist or wait for it to pass. The hard partof avoiding shaving pimples/acne is that the lather covers them up. The simple solution is to remove the lather in the area. If you use a straight razor, it’s as easy as rotating the tip of the straight razor like a drill on top of the area to remove the lather. If your using another method, your finger works too.

In planning the shave, some sources recommended shaving the moustache and chin last so the soap and water have more time to soften the hairs. Following this step should make shaving those areas a little easier. If you decide to wet shave and find that the lather dries out before you can get to these areas, don’t worry, just dip the very tip of the brush in some water and add it to the lather.

Shave Lightly and Only “With the Grain”

The actual shave is not too different than normal. But, as the section title says, shave lightly and only with the grain. Shaving lightly is recommended because it helps reduce cutting pimples tremendously. Using a straight razor and controlling the angle and pressure, you can actually shave right over acne without cutting pimples. This, however, takes a certain amount of skill with a straight razor. Not recommended for the uninitiated. Learn more about straight razor shaving here.

It is extremely important to not go over the area again. The more passes you make, the greater the chances of cutting pimples. Don’t try to get that one last hair. It’s not worth the extra time spent doing first aid when you do cut it. In addition, they always tend to flare up again, 10x worse if you fail to keep the area sanitized. Trust me, I am much more familiar with this subject than I want to be.

Shaving with the grain will leave you with stubble. Shaving is after all, beard reduction in phases rather than chopping off all the hair at once. Well, you could do it, but it’s extremely uncomfortable and your face will not like you. If a with the grain pass does not leave you with a close enough shave, then you can proceed with an across the grain pass (XTG). This means cutting the hairs perpendicularly. For example, if your beard grows downwards, across the grain means going from a left to right or right to left direction. Again, don’t use a lot of pressure to reduce the pimple cuts.

If a XTG pass is not enough beard removal for you, I highly recommend you stop and proceed to the post shave steps. However, if your job requires it, then proceed to the against the grain pass (ATG) with the following advice. If you do choose to make an ATG pass, then you must use a traditional shaving method. As mentioned in the first part of this article, a DE or straight razor gives you infinitely more control over the shave. In addition, the blades are sharper and will cut more and irritate less. Again, a straight razor is even better than a DE.

The same advice applies for ATG than all the other passes. Except that you *must* avoid pimples. Shaving ATG is a certain way to cut into any breakouts you may be experiencing. So, shave well and go lightly. If your using a straight razor, reduce the angle.

Post Shave

The post shave routine is even more important in preventing new breakouts. The first thing to do is wash off your face with cool water. This will help seal up the pores and prevent new irritants/infection. The next step is to kill off any bacteria left on your face. Sea Breeze acne astringent gets the best reviews and recommendations of any astringent I found. I personally don’t use an astringent anymore.

Many facial care providers try to sell you alcohol free antiseptic solutions for using on your face after you wash it. While these can help prevent breakouts, they’re pretty darn expensive. Never fear, our forefathers had that figured out too. After the shave, they used something called an alum block. An alum block is exactly that a block of alum. Alum is an antiseptic and anti-hemorrhaging agent. Thus, it’s great for both stopping bleeding and disinfecting your face. An alum block has the added benefit of sealing up your pores as well. There’s no reason alum block usage must be limited to your beard area.

If using an alum block is not for you, then use one of the following antiseptic products. Using an antiseptic is important because after the shave, your pores are opened up due to the hot water and lather. I suppose you could shave with cold water, but that’s just unnecessary pain.

ALUM BLOCK
Taylor of Old Bond Street Alum Block
$16.98

7 Amazon.com reviews
OIL FREE ASTRINGENT
Sea Breeze Astringent (3 Pack)
$14.75

21 Amazon.com reviews

Moisturize. Men do it too.

After disinfecting, the next step is to moisturize. This is important because after you’ve washed your face and shaved, you have no oils. Your face will detect this and go into oil production mode. This is bad because oil + dirt + pore = acne. So, moisturize your face and tell your oil glands to chill.

Any non oil based moisturizer with SPF is recommended. While the SPF doesn’t exactly help prevent acne, it does protect your face from the sun and premature aging. It’s an investment into your future you want to make. Besides, if you’re going to use a moisturizer, might as well wear something with an added benefit.

My Recommendations

I’ve spent a lot of time researching how to beat acne. More time than I care to admit. All the sources agree that skin care is the basis of prevention. All sources also agree that only two products have been clinically proven to reduce active acne: benzoyl peroxide and salicylic acid. Proactiv is easily the most widely promoted acne fighting system available. However, you can easily replicate the treatment at a much cheaper price. I’ll show you how in a little bit. But let’s take a look at how Proactiv works.

  • Step 1 is a daily cleanser. You’re supposed to use it twice a day.
  • Step 2 is a revitalizing toner. Again, use twice daily.
  • Step 3 is not really a step, but rather an acne spot treatment. They suggest twice daily usage.

Looking at how these items work, you’ll notice that the cleanser and spot treatment use benzoyl peroxide as the active ingredient. Now, all of these products use benzoyl peroxide as the active ingredient. As you’ve just read, benzoyl peroxide and salicylic acid are the only two clinically proven treatments that work.

Okay, now that’s out of the way, let’s see how wet-shaving replicates and even surpasses the Proactiv treatment regimen.

Wash your face twice a day, no more, no less.

Use a gentle, oil free cleanser. Salicylic acid or benzoyl peroxide in the wash will not hurt, but these products do dry out the skin. Over-washing the face is just as bad as under-washing. You have to remove the dead skin cells that clog your pores and the excess oil that helps trap dirt. But, you can’t remove it all. Your skin needs the oils and moisture to remain flexible and healthy. If you have a lot of oil in the middle of the day, I recommend washing your face with just water and pat drying with a towel. It’s important to wash your hands first and pat dry, don’t rub. Rubbing spreads oil and dirt.


Purpose Gentle Cleansing Wash
$7.99

31 Amazon.com reviews
Cetaphil Daily Facial Cleanser For Normal to Oily Skin
$14.04

15 Amazon.com reviews

Exfoliate

Exfoliation is key. There’s no substitute. Your skin sheds layers upon layers of cells each day. These cells normally fall off and that’s it. But some become attached to oil and then clog your pores. Reducing the amount of skin cells on the surface helps prevent excess shedding and breakouts. Many facial scrubs are marketed to do this task. Don’t be fooled though, all exfoliation does is remove the top layer of skin. Think about that.

Shaving is a great exfoliant. If you don’t believe me, try shaving an area of skin without using lather or water. You’ll see a bunch of dead skin cells on the edge of the blade. That’s the razor exfoliating. Yup, you’re paying for a single use product when all you really need to do is run a sharp blade over your skin. That said, I’ll give exfoliating scrubs their due when talking about the other areas of your face. While shaving your forehead is possible, I doubt many people do it. And shaving your nose is just impossible. But there’s no reason to not shave the entirety of your cheeks.

Disinfect

Proactiv’s revitalizing toner is an astringent. It kills bacteria on your face, preventing new infections. Proactiv’s may contain other ingredients, I don’t know exactly what’s in it. Any alcohol free astringent will work. The goal of this process is to kill any surface bacteria. As I said above, an alum block will do the same thing. Of course, you don’t shave day and night, so an purchasing an astringent is a good idea. Sea Breeze is a good choice.

ALUM BLOCK
Taylor of Old Bond Street Alum Block
$16.98

7 Amazon.com reviews
OIL FREE ASTRINGENT
Sea Breeze Astringent (3 Pack)
$14.75

21 Amazon.com reviews

Don’t pop them!

Bursting whiteheads is just plain asking for it. Not only are you releasing millions of bacteria onto the surrounding area, but you’ve just angered your skin. Not only is the pimple likely to come back bigger and meaner, but now you’re going to have to continually disinfect and treat the area to ensure proper healing. And don’t get me started on the scarring…. Now, all that said, I’m guilty of having done the very thing I advocate against. I hope you learn from my mistakes, but if you don’t and find yourself popping them, at least follow the following advice.

But if you do…

Sometimes, acne bursts due to normal washing or you nick it while shaving. Hopefully that means it was ready to fall off anyway. Either case, basic first aid principals apply. Step 1, stop the bleeding & disinfect. I high recommend a styptic pencil or alum block for this task. Not only will it quickly seal up the wound, but it serves as an antiseptic. Highly recommended. After that, seal up the wound using liquid bandaid. I use New Skin. Then, twice a day, disinfect the area with alcohol and reapply the liquid bandaid.

STYPTIC PENCIL
Clubman Styptic Pencil
$1.35

8 Amazon.com reviews
LIQUID BANDAID
New-Skin Liquid Bandage — 1 fl oz
$4.59

5 Amazon.com reviews

Use Spot Treatments & Salicylic Acid

Benzoyl peroxide based products are the best I’ve found. The active ingredient is the same in most products, but I use either Glytone or Persa Gel. All sources agree that salicylic acid works. Most also recommend treating the entire affected area. Doing research, I found that all products contained the same % of salicylic acid. Neutrogena’s also moisturized. Added bonus. I’ve been using Acne Stress Control with good results for years now. It moisturizes, exfoliates (salicylic acid is the active ingredient in many exfoliating peels), and prevents breakouts.

DAILY TREATMENT
Neutrogena Oil Free Acne Stress Control
$5.99

39 Amazon.com reviews
SPOT TREATMENT
D.R. Harris Almond Shaving Soap Refill
$15.13

8 Amazon.com reviews

That’s it. Follow those recommendations and you will have better skin. I can’t guarantee an end to acne, but your skin will be healthier. My personal regimen is to wash my face in the morning, shave, then apply spf moisturizer. At night I was my face and apply the 3 in 1 Acne Stress Control. That’s it. I’ve had great success following this regimen. Of course, I’m not exactly 17 either.

I hope this article helps, share your acne fighting experiences below.

PSA: Tony Miller Practice Strops are Back!!!

That’s right, the extremely popular practice strop from Tony is back on his website. Now, judging by how long it usually takes him to sell out, your going to have to move quickly.

If you need a strop, buy this strop. If you’re using one of my inexpensive alternatives, buy this strop. You will not regret it. Its just as good as his regular offerings, minus the excellent hardware and cotton component. Its the perfect strop for the man just getting into straight razor shaving. Note: I have no affiliation with Tony other than he makes excellent strops and he’s such a nice fellow.

Buy yours here.


And that ends today’s public service announcement.