Straight Razor vs Shavette

The eternal debate a lot of new straight razor users ask before buying an expensive new straight razor is: “Should I buy a shavette instead?” This article aims to help you decide which is better for you.

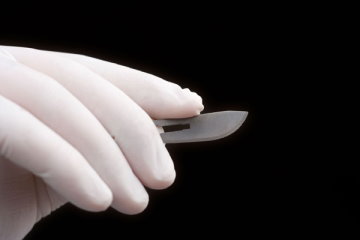
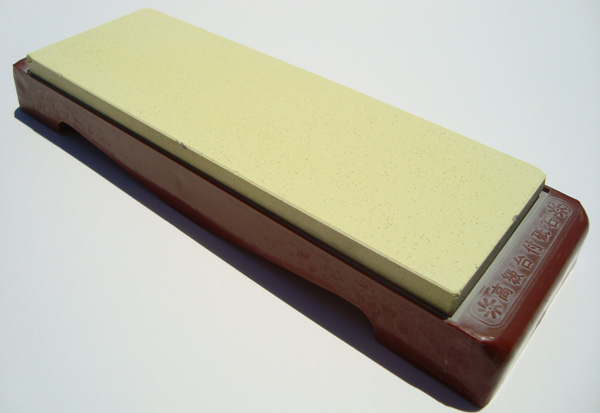
I will begin this article with a preamble about my personal thoughts on shavettes v. real straight razors. A shavette is NOT a straight razor. It is not even a real straight razor alternative. It was designed for the hair styling industry as a styling tool. In recent years, after straight razors were banned in many states, barbers turned to disposable shavettes to continue offering real barber shaves. New straight razor users are lured towards the shavette because of its seeming simplicity, cost, and low upkeep. The thinking is that a shavette is a stepping stone or alternative to a real straight razor. While the first may be true, the second is not. A shavette is no more an a straight razor than a Rolls Razor or DE. In fact, a Rolls Razor is closer to a straight razor than a shavette is.

The reason I say all that is because a shavette relies upon DE blades. DE blades do not perform the same as true hardened and sharpened steel. DE blades rely on teflon to cut through your beard. A straight razor relies upon the sharpening process to cut down your hairs. In addition, the shavette suffers from lack of weight. Its not something new straight razor users think about when buying a razor, but a shavette is extremely light weight. While too much straight razor makes it unwieldy, weight behind the razor helps power through hairs, making the shaving process easier. My final argument against shavettes is that they are just cheap plastic. If you buy a truly nice one, you might as well spend the money on a real straight razor.

Shavette

Straight Razor

  • Small initial investment
  • Large initial investment
  • Does not hold its value well
  • Holds its value well
  • Limited to the available manufacturers of blades
  • Near infinite types of edges and honing methods available
  • Change the blades every 5 days or so
  • Needs resharpening every 6-12 months (with an experienced user)
  • Sharpening is as easy as changing the blades
  • Sharpening requires an entirely new skill set. Best done by an experienced sharpener
  • No stropping necessary! None, whatsoever. Just change out the blades when you think its getting dull
  • Stropping, while not necessary per se, prolongs edge life so significantly it really is necessary. Stropping is also its own skill set which should be mastered by the straight razor user for optimal edge longevity. Expect 10% to 25% of normal edge life expectancy if you don’t strop your straight razor.
  • If you damage a blade, you can just switch it out.
  • Damage to the shavette itself would be fatal
  • If you damage your blade, that’s the only one you have. While possible to perform edge repair on small chips or nicks, if a crack develops it is most likely the end of your razor. That said, serious damage is extremely rare.
  • The cost is the same as a DE razor. While you only use half the blade, you cannot flip the razor over and use the other side.
  • Smaller blade width
  • Typical straight razor has a 3″ blade
  • Very few handle choices
  • Wide variety of scale and blade steel choices

The shavette was originally designed and marketed as a barber’s tool for shaving the back of people’s necks and other hair styling applications. Yet, that doesn’t mean it doesn’t work as an alternative to a straight razor. More or less a “DE on a stick”, the shavette can and is used much like a straight razor is. The shavette truly is a DE razor. It uses the same blades, and you are limited to the same exact manufacturers and blade types. Except the shavette is used in the same style as a straight razor.

The real difference between the straight razor and the shavette comes down to style. The straight razor is the “real deal” while the shavette is an imitation. The straight razor has many more options in terms of scales, point styles, grinds, steel, etc. The shavette is always going to look more or less the same and come with very similar handles. This also plays out in terms of initial investment. A shavette’s initial cost is much less than a straight razor. While the straight razor may pay for itself in the long term, the upfront investment is pretty steep in comparison. However, the straight razor tends to hold its value much better.

In terms of performance, the shavette performs more or less exactly like a DE does. The difference being that you are in control of the angle. However, other than that, your using exactly the same blades, from exactly the same manufacturers. The straight razor’s cutting performance is different according to each manufacturer, blade grind, weight, honing method, sharpener’s skill level, and steel. The straight razor also has a larger blade. Unlike a straight razor, the DE blade is limited to the manufacturer’s edge. A straight razor can be sharpened on many different types of stones, imparting slightly different edge types. You can have the straight razor sharpened on a coarser stone, a finer stone, a synthetic stone, or a natural stone. You can even use pastes or diamond sprays to finish a straight razor.

In terms of maintenance, the shavette takes the cake. All you do is replace the blade. While a straight razor doesn’t have to be stropped, it certainly cuts down the life expectancy of the edge by a lot. A strop is another added cost, but if you read our selecting a strop guide, you don’t need to splurge at all. But it is another skill set to learn; but a skill set that pays dividends in the long term.

So, in conclusion, if you want a DE which shaves similar to a straight razor, buy the shavette. If you want to shave with a straight razor, buy a straight razor. You don’t have to buy a strop initially. You don’t even have to strop it initially. Try it out, see if you like it, and if you do, invest. Otherwise, you can get most of your money back.

Physics of Shaving: Cutting Edge Formulas

In our previous post on the physics of shaving, we discussed what exactly goes on during the actual shave on the molecular level. To recap, the razor cuts through hairs because the force imparted by the razor overcomes the forces holding the hair together. The thinness of the edge magnifies the pushing force into a small area, enabling the razor to cut.This article will explain exactly how that works for those who are curious.

The basic physics law at work is Newton’s second law.

F=MA

In practical terms, the force behind the razor is controlled by how fast and hard we move the razor across our faces. Thus, to achieve maximum cutting force, we should strive to move the blade faster. In reality, the speed of the blade is absolutely restricted by the user’s skill and the threat of cutting into the skin. Put another way: move the razor too fast and your going to look chop up your face.

The other fact we can deduce from this formula is that a heavier razor will cut more effectively than a lighter razor. This is why wedge type razors are perceived to be better than hollow ground razors by some users. This also explains why 8/8″ razors are perceived to cut better. They are also popular the sheer size of the razor is desirable in itself to some users and collectors.

Back to the molecular level. We all know a sharper razor will cut through hairs more efficiently than a dull razor. This is because of the physics of pressure. Concentrating the force into a smaller area increases the level of force acting upon the hairs. The formula is below:


As you can see, the pressure exerted upon the hair increases as the edge radius decreases. Since reducing the edge radius decreases the surface area in contact with the hair, the force imparted upon the hair is magnified exponentially. However, the razor can only cut as well as the person handling the razor. We can decrease the edge radius to as small as possible, but ultimately, the F component is the key. If the user only uses 50% of their potential, the hair is only being cut half as effectively.

Looking at how razor dulling affects the forces exerted upon the hairs, we have to first define razor dulling. Razor dulling on the molecular level would be an increase in the edge radius (the thickness of the edge where 0 edge radius is a perfect razor). The above formula shows that a 10% increase in edge radius imparts a loss of 9.09% of the pressure acting upon the hairs. A 50% increase in edge radius results in a loss of 1/3 of the pressure. As you can see, the skill of the user is vastly more important than the sharpness of the razor.

So, to sum it all up: The sharper the razor, the greater the impact upon your shaving skill. However, the forces imparted by you are vastly more important than how sharp the razor is.

Did you like this post? Let us know in the comments below.

Because Shave Ready Isn’t Sharp Enough for Us

Because “shave ready’ isn’t good enough. We’re just not satisfied with the level of polish and the edge off of the 8k stone. While shave ready is certainly comfortable and sharp, we want our razor to just look at the hairs and scare them into cutting themselves. We want the hairs to just “pop off” once contact with the razor’s edge is made. An 8k finish just doesn’t quite do that. Stay tuned for our series on why a smoother polish is better and why pulling happens.

Continuing the true honing process, we continue polishing the razor’s edge on a Naniwa 12,000 grit waterstone. Before beginning the next step, we continually examine each blade and test it. Once we are satisfied that we’ve gotten all the sharpness out of the 8k stone, we begin honing on the 12k stone. During these final polishing steps, individual attention to detail is critical. Over-honing and under-honing are the obvious pitfalls. The process can be likened to threading a needle.

Since each blade requires a different number of laps, we cannot tell you how many laps we do. As many as is required is the answer. It is a continual process of honing a few laps, testing, honing a few laps, testing. The process ends once we are satisfied with the edge. At this point, we consider the edge to be “beyond shave ready.” The razor is extremely sharp and will shave hairs effortlessly.

Yet, that isn’t the end of our honing process. While other honemeisters and razor sharpeners are satisfied with this level of polish, we aren’t. We are after the ultimate edge. There is one more step in our honing process. The final polishing procedure that makes our razors truly honed.

Average time spent at this stage: 10 minutes


Inaccurate Portrayals of Straight Razor Shaving or How Not to Use a Straight Razor

I have no idea why Hollywood simply cannot portray straight razor usage correctly. Is it really that hard to find someone who knows how to use one? Can they not do some quick online research on how to hold the blade? Straight razor usage should be seemingly obvious, but as my experience and Hollywood pictures show, that is simply not the case.

Back in the 90’s, when I was buying my first straight razor, as I was asking the salesperson at the knife store about straight razors, another customer chimed in on their use. He was under the impression that you dragged the straight razor spine first across the hairs. He said that the razor was supposed to be so sharp that the hairs would just pop off. He even claimed that that was how his friend used his straight razor while camping. In case you were wondering, it doesn’t work.

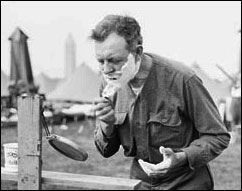
Perhaps these people got their incorrect beliefs from Hollywood. Just take a look at these pictures. Robert Duvall was part of the “Actors Acting” special by the NY Times. The below picture appears to be a promo shot.

Below is a screenshot from the HBO series Game of Thrones. What is interesting is that in the season’s first episode, one of the characters receives an accurate portrayal of a straight razor shave. Why they couldn’t get that same guy to give the other actor shaving tips baffles the mind. If your going to portray something, why not do so accurately or not at all?

And what is even more baffling about the Robert Duvall photo is that Robert Duvall himself clearly knows how to shave with a straight razor! Check out the video below of the actor using the razor correctly. Clearly the photographer or someone thought that it would look better to have Mr. Duvall show people how to gouge themselves with a straight razor! Clearly the razor is dull otherwise Mr. Duvall would be bleeding all over the photo set from the promo shot. He’s also clearly not really shaving in the video since there is no hair removal.


What are your thoughts? Do you think the media unfairly portrays straight razors? Tell us in the comments.

How to Face Lather

Face lathering is a simple process requiring nothing more than hot water, a brush, and soap. This lathering procedure is superior to any other in our opinion. The lather is hotter. It stays hotter longer, and the lathering action on your face really gets the lather into the stubble. But mostly, the hot lather feels much more soothing. Finally, you have one less dish to wash.

The first step is to soak the brush in hot water for at least a minute. We recommend washing your face or taking a shower while you soak the brush. This step is important because the brush hairs need to soak up water for maximum efficiency. Once your ready to start lathering, ring out the brush by squeezing out the excess water. But be careful, you only need to remove enough water so that your brush doesn’t drip everywhere. Water is good.

The next step is to load up the brush. There is no right way or best way to do this. We use the same circular motion used to lather. You can also spin the brush, making half rotations. You don’t want to load up with too much soap because you’ll have to add a lot of water to thin out the lather. You can always add more soap if the lather isn’t building, but you can’t remove soap; you can only add water. Experience will tell you how much soap you need.

Next, dip the tip of the brush in the bowl of hot water. You did keep it right? Then, start lathering one cheek until a good lather builds. Use the regular circular motions you’ve always used to build lather, only this time lather on your face instead of a bowl or your palm. Once a good lather has been built up, paint the lather on your neck, chin, and mustache. Finally, use the circular motion to build up lather on your other cheek. Once the lather has been built, paint the lather on any spots you missed.

At this point, the lather either is or isn’t to your liking. If it is, start shaving! If not, follow these simple troubleshooting steps. For lather that is too thick, dip the brush in water again and repeat the lathering procedure. This will thin out the lather. Depending on how thick the lather is, you can just use painting strokes to apply and thin out the lather. If the lather is too thin, re-soap the brush and repeat the entire procedure until the lather is thick enough to your liking.

And that’s it. Simple right? How do you lather? Tell us in the comments below.

Our Thoughts on Glycerin Soap

Image courtesy of Razor Emporium

Someone asked the other day why we don’t have more articles on lathering. The truth is that we’ve been concentrating on writing other articles and tips. We apologize to lather for neglecting it so. Yet, the truth is that we kind of give lather a short shrift and nary a second thought. We use tallow soap pretty much exclusively due to its superior characteristics v. glycerin. In this post we’ll give you our thoughts regarding glycerin soap as we continue working on our review of Groom Room Essence of Scotland Soap.

While we do believe tallow soap is a superior product in terms of straight razor shaving use, we recognize that it isn’t for everyone. Read our endorsement of tallow soap here! Glycerin soap’s main ingredient is glycerin. The by-product of either soap making or bio-diesel, glycerin can be vegan friendly. Whereas tallow must be reduced from animal fat, glycerin can be produced from other sources.

We’ll start off our actual thoughts on the performance of glycerin soaps in shaving applications with the general observation that for the most part, all glycerin soaps shave the same. Whatever the reason, unless you purchase a bad batch of glycerin shaving soap, the end product is going to feel more or less the same. This is not to say that there are not bad soaps, but all the good glycerin soaps more or less perform the same. Of the soaps we’ve tried, Edwin Jagger’s line disappointed us the most.

Super Glycerin Lather

Glycerin soap lathers up easily and quickly. It can produce some incredibly thick lather. In fact, the lather you can produce with glycerin soap is much thicker and creamier than what you can produce with tallow soap. This is certainly the soap of choice for fans of super lather. Just look at the picture to the right. I just whipped up some glycerin soap in my hand for this article and took a picture. For a picture of glycerin soap applied to the face, click here.

This thickness serves to truly cushion the face during the shave. However, unlike tallow soap, this lather is extremely thick and not the most conducive to straight razor shaving. While the end result is more or less the same in the hands of a skilled practitioner, tallow soap is much slicker and easier to glide the straight razor across. In an upcoming article we will show you the perfect straight razor shaving lather consistency using tallow soap.

Glycerin soap has two more benefits worth mentioning. The first is the smell. Oh, the fragrances you can purchase. They are both numerous and unique. As varied as the number of soap makers, and there are many. The second is the clean feeling it leaves. Glycerin soap just wipes off clean and leaves you feeling fresh and clean. It does leave the skin a little drier though. We recommend using an spf moisturizer in either case.

Glycerin soap makers are limited only by their imagination and the availability of fragrances for their soaps. Unlike tallow soaps which come in only a handful of fragrances (most of them admittedly “vintage smelling”),  glycerin soaps come in an infinite variety of fragrances. From citrus notes to woodland tones you can find whatever fragrance tickles your fancy that morning.

So, to sum up the article, glycerin soap gives an incredibly thick lather, can be vegan friendly, and comes in a dizzying array of fragrances. While we still prefer tallow soap, glycerin soap is a very close second. What is your favorite soap? Tell us in the comments.

ASR’s Beginner’s Guide to Straight Razor Sharpening

A beginner’s guide to get started honing your own razor. Covering the very basics of what you need and how to do it, this guide is for the straight razor enthusiast who wants to know exactly what goes into honing a razor. Check out our What Makes a Honemeister series for more insight into the honing process.

The following article explains in detail exactly what you need to start honing. As you can see, honing is not something to be taken lightly. The stones are costly and the skill requires a very large time investment. However, for the self-sufficient man, learning to hone is a must-have skill. While we recommend you only touch up your razor for best results, we understand the desire to be entirely self sufficient. We hope you enjoy the article and please leave comments below.

Article Outline

Necessary Equipment
The Plan
Pyramid Honing
Regular Progression
To Tape or Not
Finishing the Edge
How to Hone & Hold the Razor
Other Tips


Part 1 Necessary Equipment
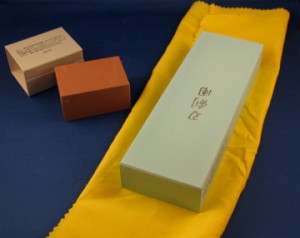
While it is possible to use the one coticule method, link at the end of the article, it is recommended to buy multiple honing stones for best results. Yet, there are dozens, hundreds, perhaps even thousands of options out there. In the end, you want to match your equipment to the task at hand. Do you want to only touch up your razor? Do you need to set a bevel? Will you only be honing razors that need a touch up? Ebay clunkers? Badly damaged razors?

As you can see, the first thing you need to figure out is how far you want to go, and what you really want to accomplish.

Touch-ups Only

This section details the minimum requirements for touching up an already professionally honed razor. It assumes you have already acquired a shave ready razor and you just need to touch it up after a couple of months. Keep in mind, the longer you go without touching up your razor, the harder it will be to bring back the edge. If you go too long, you will need to either spend an inordinate amount of hours on a finishing stone, or you need to use a lower grit stone. A coticule has the advantage of being able to do both jobs.

As for pastes and chromium oxide, you can conceivably continually use the pastes for the foreseeable future of the razor, however, over time the edge becomes rounder, more apple seed-like. Eventually the edge is reformed to the contours of the stropping medium and it will get no sharper, nor will it get any duller. Some people are okay with this level of sharpness, most people aren’t. That is something you need to decide over the long term.

The cheapest and best way to keep your razor shaving sharp is to get some chromium oxide and an extra strop. The chromium oxide works very well with a cloth-like piece. So felt, linen, cotton, etc strops will work just fine. If your wallet is exceptionally thin, a piece of balsa wood glued to a harder wood will do the trick in a pinch. You could cut off a strip of old jeans to use as a makeshift strop.

Sparingly apply the chromium oxide to the substrate and use the same motions as stropping. How to apply crox powder. If you purchase the crayon version, just rub it on the chosen medium lightly and then wipe off the excess with a paper towel. Remember, you do not need to make your strop look a deep green. All that is needed is enough to lightly coat the surface.

Touching up using  stones

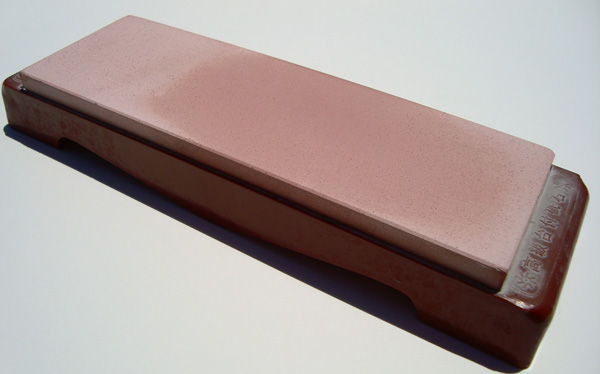
If you want to use a stone for touch ups, you need a finishing stone. A finishing stone is a stone used after the 8k stone. Natural finishing stones include Nakayama, Escher, Coticule, etc. Synthetic stones include: Shapton 16k or 30k, Naniwa 12k, Spyderco UF, etc. Vintage barber’s hones are also a good option.

The first thing you need to decide is whether you want a synthetic or natural stone. A natural stone will have more variance between each stone, whereas a synthetic is supposed to be the same exact stone, no matter which you buy. Cost is probably going to be a factor here as well. Economical options are either a Chinese stone (available at woodcraft) or a barber’s hone. In the synthetics world, it really doesn’t matter which stone you choose. It’s a personal choice that comes down to the feedback of the stone, how quickly it cuts, and how the finished blade feels when shaving. If you have the time and patience, try to find people who have the stone you want to purchase and ask them to finish your razor on it.

As we stated earlier. The longer you take in between touch ups, or if you don’t completely rehone the edge, the longer it will take to resharpen the razor. If you wait too long, you will need to use a lower grit stone (5k or 8k) to re-polish the shaving bevel.

Full Progression

For light to moderate honing, you are going to want at least an 8k stone, and preferably a 4k and 8k stone. Ideally, you want a 1k, 4k, and 8k stones. The 1k stone really cuts down on time, turning what could take several hours on the 4k stone, into just one hour or less on the 1k stone. Norton makes a 4k/8k combo stone, which is a pretty good buy. Again, there are natural and synthetic options, but I recommend sticking with the synthetic stones unless you want to go the single coticule route. You will also want some form of magnification. I prefer a quality 10x eye loupe; you get what you pay for. Another inexpensive option is the Radioshack $10 microscope (I don’t suggest this). The magnification is used to check for chips too small for your eye to see, facilitation of the marker test, etc.

For heavier honing (razors requiring a bevel reset), you are going to need at least a 1k stone. Ideally, you want a whole progression of stones from ~200 to 1,000 grit. This is necessary because the scratches left by a 200 grit stone cut deep and a 400 and 600 grit stone make life easier. Norton, DMT, Naniwa, and Shapton all make 1k stones and below. Norton makes a 1k/220 grit combo stone. DMT stones are diamond hones and cut quite fast. However, they leave deep scratch marks. It is recommended to stick with one manufacturer of synthetic stones because there is no universal grit rating. Thus, if you bought a Shapton 4k/8k set, yo should buy the Shapton 1k and below.

For restoration work (razors requiring bevel establishment/chips/other edge damage), you need a lower grit stone than 1k. DMT 320 or Shapton, Norton, & Naniwa 220 grit stones are good options. The point of this low grit stone is to cut through the metal quickly so you can reach the undamaged portions of the edge and get that bevel set using the 1k stone. More on this later.

In summary: figure out exactly what you want to do with your razor(s); try to stick with one brand; have fun!

Part 2: The Plan

Now that you have the stones you need to figure out how to use them. But before that, let’s discuss planning your honing venture.

Touch-ups

For touch ups, you really just want to do enough strokes on the pasted strop or finishing stone so that the edge gets back to the level you want. Touch-ups mean the edge is still shaving sharp, but not quite up to the standards you expect/demand. When your razor gets to this point, do not wait; touch up the razor immediately. Do laps in sets of 10, do a patch test (shave a patch of hair) and determine if you want the razor to be sharper. Repeat until the razor is performing up to your standards. The number of laps and time commitment will depend upon the condition of the edge. For example, if you haven’t touched up the razor in six months and have a normal beard, expect to do approximately 40-80 laps and spend 20-40 minutes touching up the razor. This also depends highly upon how good at honing you are and the grit level of the stone you use.

Honing

I am going to discuss the hone plan from a 1k stone all the way up to finishing in this section.
The first thing that needs to be done is the bevel. The razor should be able to shave some arm hairs coming off the 1k stone. The razor should also pass the marker test (explained in the actual honing section). If the razor is too dull to shave anything, more work is needed. The razor should behave like a very sharp pocket knife. Even pocket knives can shave arm or leg hairs. Once the bevel is done, you can move on. BUT NEVER BEFORE. Getting the bevel right is the most important step.

After the bevel is done, you must make a choice. To do a regular 4k/8k progression, or use the pyramid. The end result is the same, the razor must shave acceptably at the end.

Part 3: Pyramid Honing

Popularized by StraightRazorPlace and Lynn Abrams, no honing guide can be complete without mentioning it. Please visit their website for more information. We do not use the pyramid method, but will try to briefly explain how it is used. The point of the pyramid is to do equal laps on the 4k and the 8k, until you reach one lap. The pyramid provides structure and a solid attack plan. A possible pyramid looks like this:
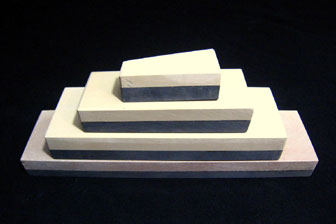
25/25
15/15
10/10
5/5
3/3
1/3
1/5

As you can see, it’s called a pyramid because the starting point has a larger number of laps than the end point. The pyramid is completely customizable and you can add a step (such as 20/20 or 2/2), change the number of strokes, and start at any step in the pyramid. If the razor is coming off the 1k stone, I recommend starting at 25 laps. If the razor is pretty close to being shave ready, I recommend starting at 10 laps or 5 laps. Where to start will become clearer with experience. When the pyramid is finished, the razor should be shaving sharp. The razor should be sharp all along the edge. If it is not, then go back to the 3 or 5 lap step. Remember, the bevel must be set before embarking upon the pyramid. Also, the pyramid illustrated above is only a guideline, feel free to craft the pyramid plan to your liking. More on Pyramids.

Part 4: Normal Progression
A regular progression means to stay on the 4k stone until the razor is “done” and then move on to the 8k stone until it is shave ready. The 4k stone is done when it is pretty darn close to shaving or when it won’t get any sharper. It will take a lot of trial and error for you to develop your own test to determine whether the razor is done or not. Remember, the razor should be sharp all along the edge. I recommend doing 30 laps and continue in 10 lap increments until the razor is “done.” This is a more advanced method because it requires the honester to know how sharp the razor should be coming off the 4k stone. No amount of words will truly explain it, you’re going to have to figure it out for yourself. But a good starting point is whether the 4k stone has removed all the scratch marks of the 1k stone. I recommend doing 5 more laps just to make sure the edge will not get any better while you are developing your “4k test.”

Once done with the 4k stone, the 8k stone really just brings the edge to its final shaving sharpness. Not many strokes are needed at this point. Start with 10 laps and repeat until the edge is shaving acceptably. Each set of stones behaves differently and may require more or less laps than another stone from a different manufacturer. However, the principals are the same. Continue doing laps in small increments until the razor passes that benchmark.

Part 5: To tape or not to tape
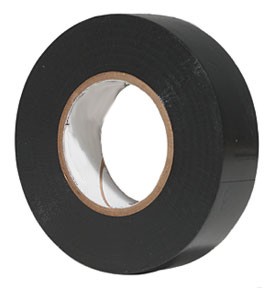
Taping the spine has a long and sordid history ever since it was first conceived. I am not going to go into the history of taping or the debate whether or not to tape. In this guide I will merely explain the benefits and potential drawbacks of taping the spine.

Taping the spine raises the angle of the bevel by a very small degree, making it more obtuse. The actual degree change is somewhere between .5 to 2 degrees (too small to really make a difference). The benefits of using tape on the spine include: protecting the spinework, eliminating further spine wear, makes a wedge easier to hone, less wear & tear on your hones, etc. By raising the spine off the hone, you no longer need to grind away at the spine in order to grind the bevel. Consequently, your hone is “used” less. By making the bevel angle more obtuse, less metal needs to be removed from the bevel when resetting, thus reducing the time needed for a bevel reset. (Not an issue with hollow ground blades, but it certainly reduces time spent honing wedges)

The cons to using tape are more long term. By not removing metal from the spine and removing metal from the edge, you are slowly increasing the bevel angle with each honing session. Eventually, your razor’s bevel angle will become too obtuse to be comfortable. How long this will take depends upon several factors. However, it is unlikely this will happen within 10-20 years. Other people think tape on the spine cheats future buyers because they don’t know how much actual honing the razor has received.

In the end, you must decide for yourself whether you want to tape or not. There is no majority opinion among honemeisters.

Part 6: Finishing the Edge
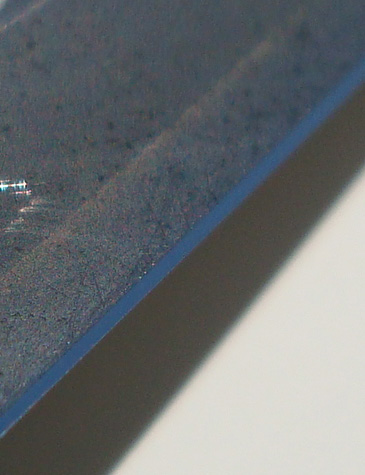
More does not mean better. Doing more strokes than necessary does not improve the edge. If it does improve the edge, then you weren’t done. More strokes than necessary are, at the very least, wasteful and at worst, you could create a wire edge. To that end, do a set of ten back and forth laps on your finishing stone and then test the blade. Repeat until you are satisfied. I cannot tell you how long this will take as each stone is different and each person more or less skilled with hones and razors. In addition, each of us has a different idea of when the razor is finished to our satisfaction.

Finishing your razor is something very personal. Each of us needs to find out which medium and which progression produces that final edge that we love. The progression is the same as doing touch ups. Do laps in small increments until the razor is dialed in. We at A Sharper Razor are never satisfied and are always pushing for a sharper, smoother edge.

Part 7: How to Hone & Hold the Razor

Now that you have the plan laid out, it is time to discuss the actual honing of a razor. I will discuss how to grip the razor and guide you through an x-stroke.

The Grip

You grip the tang of the razor in between the thumb and index finger. Your pinky finger should be curled around the scales. The other two fingers are support fingers and should be curled around the scales/tang. The only pressure needed by the index and thumb is whatever is necessary to control the razor on the stone. You do not need to grip the tang tightly at all. The pinky finger controls the angle of the blade in relation to the surface of the hone. This will make more sense after reading the rolling stroke section.

The Platform

It is possible to hold the hone in your hand. However, if the hone is heavy, this becomes extremely uncomfortable. In addition, your hand is not a stable surface. Placing the hone on your lap is an option, but the best option is to place the hone on a stable surface, i.e. a table. You don’t have to follow this advice, but I get better results “benching” the hone.

The Straight Stroke

Also known as the push method, you simply push the razor straight across the hone. This method only works with perfectly flat razors. Any imperfection in the edge will result in an uneven hone and dull spots.

The X-Stroke
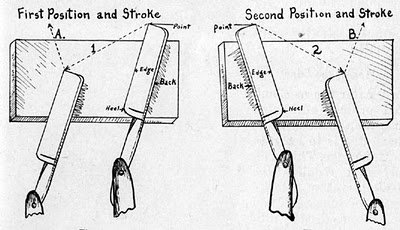
The X-stroke is the most popular means of honing. Simply put, it works. The x-stroke helps to overcome any irregularities in the spine/edge and hone. Much thought has been devoted as to why the x-stroke works, but that is not the purpose of this guide. That said, a push stroke will also work. A push stroke is also self explanatory and needs no guide.

The stroke starts by laying the razor on the hone, the entire spine and edge should be touching the surface. Some people start the razor at a slight angle, but you can start the razor perpendicular to the hone.

If sitting, keep your elbow at or slightly above the level of your hand; if standing your elbow will naturally position itself above the hand (unless the hone is chest high). Pull the razor towards you and to the right. Pull straight towards you, not down, not up (this is why you keep your elbow at/above hand level). Use your pinky finger to make sure the spine and edge are flush with the stone.

Rotate the razor on the spine as shown. NEVER ROTATE THE RAZOR ON THE EDGE. For obvious reasons.

After facing the razor in the opposite direction, repeat the above steps in the opposite direction.

Part 8: Other Tips and Guides

In this final section of our Beginner’s Honing Guide, we share with you some final tips and tricks you need to know. The first is the rolling x-stroke. Necessary for tackling smiling or frowning blades. Also useful for non-straight line edges. The second is the water and marker test. Necessary to know whether you can move on in your progression. AKA: whether your actually doing anything to the edge.

Rolling X-Stroke

The rolling-x is needed for razors with a pronounced smile. The stroke is exactly the same as a regular X-stroke, but the pinky is used to control the angle of the razor. The pictures below are an exaggerated rolling-x. The stroke starts with the heel of the razor lower than the toe. The middle is honed parallel to the surface of the hone, and the stroke is finished with the heel higher than the toe. The pictures explain the process. To adjust the height, adjust the tension of your pinky finger.

Other methods are possible. It is not the goal of this article to explain them all. If you have difficulty honing your razor, you are much better off sending it to a honemeister. For more information and animation, please click here.

Water & Marker Test

To help determine whether the entire edge or the part of the edge you are honing is actually making contact with the hone, you can watch the water in front of the edge. The edge should be acting as a snow plough and displace all the water in front of it.

The marker test is to take a permanent marker, color the edge of the razor, do a couple of strokes on your stone and check under magnification if the very edge still has marker on it. If the entire bevel is shiny, your stroke is fine and the bevel is established. This test is best used in conjunction with optical magnification. We recommend a good microscope, or at the very least, a top of the line jeweler’s eye loupe.

Links to Other Guides

Knifecenter Guide to Honing

Norton Pyramid Honing PDF

Coticule Honing by Bart

The Physics of Shaving/Cutting Hair

At its core a straight razor is a specialized knife. The physics of a straight razor are the same. There are two reasons a knife or scissors cuts: simple pushing force and shear stress. Both are at work when we shave.

Shear stress is at work when you use a scissors to cut through paper. The two blades move past each other forcing the medium being cut to tear. Putting it simply, the hairs can only withstand so much force. A scissors works by holding the hair in place and applying force to shear off the hair being removed. See this page on shearing action for more information and an animation visualizing this concept.

The other physics acting upon our hairs is a simple pushing force. A blade cuts because the edge is extremely small. In the case of a straight razor, .5 microns or smaller. This small edge is then pushed into the hair. The hair, being softer than hardened steel, yields first. The physics is simple: force is magnified if concentrated in a small area. The stress acting upon the hairs is directly proportional to the force being applied and inversely proportional to the surface area. In plainer terms, the hairs will be cut easier if you use more pressure/force and a sharper razor.

So, applying the physics to our shaving regimens, we can have a better understanding of the physics of our shave. The pushing action is generated from the physics of the razor being pushed through the hairs. The hairs, being of a much softer substance, give way easily. But not before the hairs bend and pull. The pushing force is generated by our hands and is directly proportional to our skill level with the straight razor. The shearing action is enacted upon the razor through the skin and the razor blade acting in conjunction with the hair. While not a perfect shearing action, the skin acts as the second force acting upon the hairs. In our case, the skin and hair follicles hold the hair in place while the razor blade slices through the hair.

Check out this time warp clip to see how these forces act upon our faces in slow motion.

As you can see, the razor doesn’t magically cut through the hairs. The razor first meets resistance, the skin is pulled, then when the hairs can stand no more, the razor slices through the hair being cut and moves on to the next hair. This resistance is what causes pulling.


The basic physics law at work is Newton’s second law.

F=MA

In practical terms, the force behind the razor is controlled by how fast and hard we move the razor across our faces. Thus, to achieve maximum cutting force, we should strive to move the blade faster. In reality, the speed of the blade is absolutely restricted by the user’s skill and the threat of cutting into the skin. Put another way: move the razor too fast and your going to look chop up your face.

The other fact we can deduce from this formula is that a heavier razor will cut more effectively than a lighter razor. This is why wedge type razors are perceived to be better than hollow ground razors by some users. This also explains why 8/8″ razors are perceived to cut better. They are also popular the sheer size of the razor is desirable in itself to some users and collectors.

Back to the molecular level. We all know a sharper razor will cut through hairs more efficiently than a dull razor. This is because of the physics of pressure. Concentrating the force into a smaller area increases the level of force acting upon the hairs. The formula is below:


As you can see, the pressure exerted upon the hair increases as the edge radius decreases. Since reducing the edge radius decreases the surface area in contact with the hair, the force imparted upon the hair is magnified exponentially. However, the razor can only cut as well as the person handling the razor. We can decrease the edge radius to as small as possible, but ultimately, the F component is the key. If the user only uses 50% of their potential, the hair is only being cut half as effectively.

Looking at how razor dulling affects the forces exerted upon the hairs, we have to first define razor dulling. Razor dulling on the molecular level would be an increase in the edge radius (the thickness of the edge where 0 edge radius is a perfect razor). The above formula shows that a 10% increase in edge radius imparts a loss of 9.09% of the pressure acting upon the hairs. A 50% increase in edge radius results in a loss of 1/3 of the pressure. As you can see, the skill of the user is vastly more important than the sharpness of the razor.

So, to sum it all up: The sharper the razor, the greater the impact upon your shaving skill. However, the forces imparted by you are vastly more important than how sharp the razor is.

Did you like this post? Let us know in the comments below.

What Makes a Good Honemeister (razor sharpener): Steady Hands


Hands like a surgeon’s

I’m going to start out this series by saying how much I hate the term honemeister. However, razor grinder is the only other commonly used term to describe someone who sharpens razors. Razor grinder is associated with gypsies and comes with a negative connotation. In addition, razor sharpener is both longer and doesn’t have that je ne sais quoi that honemeister does.  Finally, if we look at the use and meaning of adding the term meister to the end of a word, the term honemeister does fit the bill.

In this series, I’m going to talk about the qualities that you need to possess in order to hone your own or anyone else’s razors. I will go over the small things like towels and a steady water supply to the equipment and experience necessary. I will describe what exactly it is that the post topic imparts to the honing process and why it is vital to obtaining a wicked edge.

To start the series out, we’re going to talk about the most basic of basics: steady hands. Sure, you could buy a honing machine or a belt grinder, but the edge you will end up with will only be as sharp as a sharp knife. A factory sharp knife at that. No one wants to shave with one of those. Well, not when we have expertly honed straight razors available. All well-honed straight razors are sharpened by hand. Sharpened by hand on stones. Sharpened on these stones for hours at a time, using repetetive motions. One mistake and the entire process is set back one step. One bad stroke and you erase twenty or more good strokes that came before.

Not only do you have to be steady and perfectly consistent to achieve the best possible edge, you have to be able to vary the pressure. From barely touching the stone during the final stages, to heavy pressure when re-sculpting the bevel. Finally, dexterity is necessary. While not crucial, dexterity enables the razor sharpener to both save time and avoid damaging the edge when flipping the razor on the stones.

What other qualities do you think make a good honemeister? Let us know below.

Its not Sharp Until Its “Shave Ready”


After refining the edge, we bring your razor to shave ready sharp using a Naniwa 8,000 grit bench stone. This hone brings the edge to what is universally regarded as shave ready. At this point the razor’s edge will give you a fine, smooth shave. The process becomes less sharpening and more polishing and refinement of the already existing edge. The 8,000 grit stone removes more of the tiny burrs and jagged edges from the actual edge and brings the razor’s edge closer to true. The end goal of this process is a bevel we can see ourselves in. The 5k stone imparted a near mirror finish on the razor, this stone takes the polish to the next level. The polish is so good, its a hair’s breadth away from being a true mirror finish. IN fact, the only reason we reserve that title is because the next step polishes the razor even further! Trust us, seeing is believing.

After the 5k stone, we polish the razor on the 8,000 grit stone until the razor’s edge gleams bright and true. The process at this stage is more polishing than sharpening. The edge is brought to an even smaller cutting angle. In mathematical terms, we are bringing the radius of the edge even closer to zero. In layman’s terms, we are working to reduce the width of the very edge as close to nothing (thin) as possible. We are working to even out any unevenness in the edge and to polish the bevel. Polishing the bevel is important because it cuts down on the cutting resistance. DE blades are coated with teflon to help cut through hairs, straight razors are polished to a mirror finish to help cut through hairs. The reason is simple, less surface resistance makes it easier to cut.

Getting the razor to shave ready depends upon each individual razor. 8,000 grit is extremely small. Consequently only minuscule amounts of steel are removed. Tougher steels take longer to remove the steel necessary to polish the edge and decrease the edge radius to acceptable levels. Even “regular” steel is still hardened and is extremely hard to cut, taking a substantial amount of time to perfect the edge. We do not stop until the razor is ready to shave. Upon achieving this level, we do a final visual inspection with magnification and prepare to take the razor to the next level.

Average time spent on this stage: 10 minutes