A beginner’s guide to get started honing your own razor. Covering the very basics of what you need and how to do it, this guide is for the straight razor enthusiast who wants to know exactly what goes into honing a razor. Check out our What Makes a Honemeister series for more insight into the honing process.
The following article explains in detail exactly what you need to start honing. As you can see, honing is not something to be taken lightly. The stones are costly and the skill requires a very large time investment. However, for the self-sufficient man, learning to hone is a must-have skill. While we recommend you only touch up your razor for best results, we understand the desire to be entirely self sufficient. We hope you enjoy the article and please leave comments below.
Article Outline
Necessary Equipment
The Plan
Pyramid Honing
Regular Progression
To Tape or Not
Finishing the Edge
How to Hone & Hold the Razor
Other Tips
Part 1 Necessary Equipment
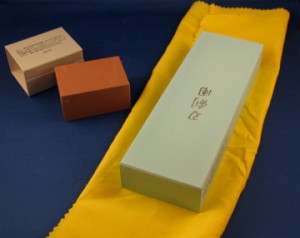
While it is possible to use the one coticule method, link at the end of the article, it is recommended to buy multiple honing stones for best results. Yet, there are dozens, hundreds, perhaps even thousands of options out there. In the end, you want to match your equipment to the task at hand. Do you want to only touch up your razor? Do you need to set a bevel? Will you only be honing razors that need a touch up? Ebay clunkers? Badly damaged razors?
As you can see, the first thing you need to figure out is how far you want to go, and what you really want to accomplish.
Touch-ups Only
This section details the minimum requirements for touching up an already professionally honed razor. It assumes you have already acquired a shave ready razor and you just need to touch it up after a couple of months. Keep in mind, the longer you go without touching up your razor, the harder it will be to bring back the edge. If you go too long, you will need to either spend an inordinate amount of hours on a finishing stone, or you need to use a lower grit stone. A coticule has the advantage of being able to do both jobs.
As for pastes and chromium oxide, you can conceivably continually use the pastes for the foreseeable future of the razor, however, over time the edge becomes rounder, more apple seed-like. Eventually the edge is reformed to the contours of the stropping medium and it will get no sharper, nor will it get any duller. Some people are okay with this level of sharpness, most people aren’t. That is something you need to decide over the long term.
The cheapest and best way to keep your razor shaving sharp is to get some chromium oxide and an extra strop. The chromium oxide works very well with a cloth-like piece. So felt, linen, cotton, etc strops will work just fine. If your wallet is exceptionally thin, a piece of balsa wood glued to a harder wood will do the trick in a pinch. You could cut off a strip of old jeans to use as a makeshift strop.
Sparingly apply the chromium oxide to the substrate and use the same motions as stropping. How to apply crox powder. If you purchase the crayon version, just rub it on the chosen medium lightly and then wipe off the excess with a paper towel. Remember, you do not need to make your strop look a deep green. All that is needed is enough to lightly coat the surface.
Touching up using stones
If you want to use a stone for touch ups, you need a finishing stone. A finishing stone is a stone used after the 8k stone. Natural finishing stones include Nakayama, Escher, Coticule, etc. Synthetic stones include: Shapton 16k or 30k, Naniwa 12k, Spyderco UF, etc. Vintage barber’s hones are also a good option.
The first thing you need to decide is whether you want a synthetic or natural stone. A natural stone will have more variance between each stone, whereas a synthetic is supposed to be the same exact stone, no matter which you buy. Cost is probably going to be a factor here as well. Economical options are either a Chinese stone (available at woodcraft) or a barber’s hone. In the synthetics world, it really doesn’t matter which stone you choose. It’s a personal choice that comes down to the feedback of the stone, how quickly it cuts, and how the finished blade feels when shaving. If you have the time and patience, try to find people who have the stone you want to purchase and ask them to finish your razor on it.
As we stated earlier. The longer you take in between touch ups, or if you don’t completely rehone the edge, the longer it will take to resharpen the razor. If you wait too long, you will need to use a lower grit stone (5k or 8k) to re-polish the shaving bevel.
Full Progression
For light to moderate honing, you are going to want at least an 8k stone, and preferably a 4k and 8k stone. Ideally, you want a 1k, 4k, and 8k stones. The 1k stone really cuts down on time, turning what could take several hours on the 4k stone, into just one hour or less on the 1k stone. Norton makes a 4k/8k combo stone, which is a pretty good buy. Again, there are natural and synthetic options, but I recommend sticking with the synthetic stones unless you want to go the single coticule route. You will also want some form of magnification. I prefer a quality 10x eye loupe; you get what you pay for. Another inexpensive option is the Radioshack $10 microscope (I don’t suggest this). The magnification is used to check for chips too small for your eye to see, facilitation of the marker test, etc.
For heavier honing (razors requiring a bevel reset), you are going to need at least a 1k stone. Ideally, you want a whole progression of stones from ~200 to 1,000 grit. This is necessary because the scratches left by a 200 grit stone cut deep and a 400 and 600 grit stone make life easier. Norton, DMT, Naniwa, and Shapton all make 1k stones and below. Norton makes a 1k/220 grit combo stone. DMT stones are diamond hones and cut quite fast. However, they leave deep scratch marks. It is recommended to stick with one manufacturer of synthetic stones because there is no universal grit rating. Thus, if you bought a Shapton 4k/8k set, yo should buy the Shapton 1k and below.
For restoration work (razors requiring bevel establishment/chips/other edge damage), you need a lower grit stone than 1k. DMT 320 or Shapton, Norton, & Naniwa 220 grit stones are good options. The point of this low grit stone is to cut through the metal quickly so you can reach the undamaged portions of the edge and get that bevel set using the 1k stone. More on this later.
In summary: figure out exactly what you want to do with your razor(s); try to stick with one brand; have fun!
Part 2: The Plan
Now that you have the stones you need to figure out how to use them. But before that, let’s discuss planning your honing venture.
Touch-ups
For touch ups, you really just want to do enough strokes on the pasted strop or finishing stone so that the edge gets back to the level you want. Touch-ups mean the edge is still shaving sharp, but not quite up to the standards you expect/demand. When your razor gets to this point, do not wait; touch up the razor immediately. Do laps in sets of 10, do a patch test (shave a patch of hair) and determine if you want the razor to be sharper. Repeat until the razor is performing up to your standards. The number of laps and time commitment will depend upon the condition of the edge. For example, if you haven’t touched up the razor in six months and have a normal beard, expect to do approximately 40-80 laps and spend 20-40 minutes touching up the razor. This also depends highly upon how good at honing you are and the grit level of the stone you use.
Honing
I am going to discuss the hone plan from a 1k stone all the way up to finishing in this section.
The first thing that needs to be done is the bevel. The razor should be able to shave some arm hairs coming off the 1k stone. The razor should also pass the marker test (explained in the actual honing section). If the razor is too dull to shave anything, more work is needed. The razor should behave like a very sharp pocket knife. Even pocket knives can shave arm or leg hairs. Once the bevel is done, you can move on. BUT NEVER BEFORE. Getting the bevel right is the most important step.
After the bevel is done, you must make a choice. To do a regular 4k/8k progression, or use the pyramid. The end result is the same, the razor must shave acceptably at the end.
Part 3: Pyramid Honing
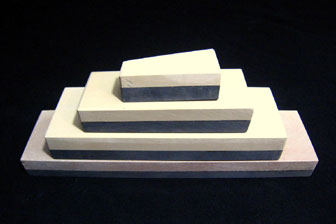
Popularized by StraightRazorPlace and Lynn Abrams, no honing guide can be complete without mentioning it. Please visit their website for more information. We do not use the pyramid method, but will try to briefly explain how it is used. The point of the pyramid is to do equal laps on the 4k and the 8k, until you reach one lap. The pyramid provides structure and a solid attack plan. A possible pyramid looks like this:
 25/25
25/25
15/15
10/10
5/5
3/3
1/3
1/5
As you can see, it’s called a pyramid because the starting point has a larger number of laps than the end point. The pyramid is completely customizable and you can add a step (such as 20/20 or 2/2), change the number of strokes, and start at any step in the pyramid. If the razor is coming off the 1k stone, I recommend starting at 25 laps. If the razor is pretty close to being shave ready, I recommend starting at 10 laps or 5 laps. Where to start will become clearer with experience. When the pyramid is finished, the razor should be shaving sharp. The razor should be sharp all along the edge. If it is not, then go back to the 3 or 5 lap step. Remember, the bevel must be set before embarking upon the pyramid. Also, the pyramid illustrated above is only a guideline, feel free to craft the pyramid plan to your liking. More on Pyramids.
Part 4: Normal Progression
 A regular progression means to stay on the 4k stone until the razor is “done” and then move on to the 8k stone until it is shave ready. The 4k stone is done when it is pretty darn close to shaving or when it won’t get any sharper. It will take a lot of trial and error for you to develop your own test to determine whether the razor is done or not. Remember, the razor should be sharp all along the edge. I recommend doing 30 laps and continue in 10 lap increments until the razor is “done.” This is a more advanced method because it requires the honester to know how sharp the razor should be coming off the 4k stone. No amount of words will truly explain it, you’re going to have to figure it out for yourself. But a good starting point is whether the 4k stone has removed all the scratch marks of the 1k stone. I recommend doing 5 more laps just to make sure the edge will not get any better while you are developing your “4k test.”
Once done with the 4k stone, the 8k stone really just brings the edge to its final shaving sharpness. Not many strokes are needed at this point. Start with 10 laps and repeat until the edge is shaving acceptably. Each set of stones behaves differently and may require more or less laps than another stone from a different manufacturer. However, the principals are the same. Continue doing laps in small increments until the razor passes that benchmark.
Part 5: To tape or not to tape
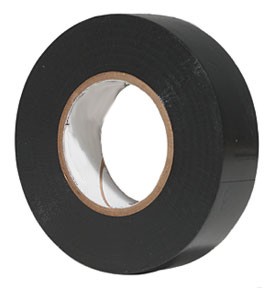 Taping the spine has a long and sordid history ever since it was first conceived. I am not going to go into the history of taping or the debate whether or not to tape. In this guide I will merely explain the benefits and potential drawbacks of taping the spine.
Taping the spine raises the angle of the bevel by a very small degree, making it more obtuse. The actual degree change is somewhere between .5 to 2 degrees (too small to really make a difference). The benefits of using tape on the spine include: protecting the spinework, eliminating further spine wear, makes a wedge easier to hone, less wear & tear on your hones, etc. By raising the spine off the hone, you no longer need to grind away at the spine in order to grind the bevel. Consequently, your hone is “used” less. By making the bevel angle more obtuse, less metal needs to be removed from the bevel when resetting, thus reducing the time needed for a bevel reset. (Not an issue with hollow ground blades, but it certainly reduces time spent honing wedges)
The cons to using tape are more long term. By not removing metal from the spine and removing metal from the edge, you are slowly increasing the bevel angle with each honing session. Eventually, your razor’s bevel angle will become too obtuse to be comfortable. How long this will take depends upon several factors. However, it is unlikely this will happen within 10-20 years. Other people think tape on the spine cheats future buyers because they don’t know how much actual honing the razor has received.
In the end, you must decide for yourself whether you want to tape or not. There is no majority opinion among honemeisters.
Part 6: Finishing the Edge
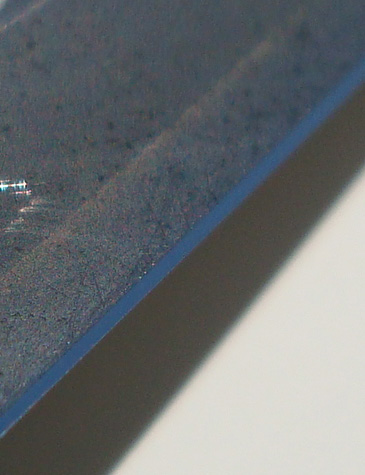 More does not mean better. Doing more strokes than necessary does not improve the edge. If it does improve the edge, then you weren’t done. More strokes than necessary are, at the very least, wasteful and at worst, you could create a wire edge. To that end, do a set of ten back and forth laps on your finishing stone and then test the blade. Repeat until you are satisfied. I cannot tell you how long this will take as each stone is different and each person more or less skilled with hones and razors. In addition, each of us has a different idea of when the razor is finished to our satisfaction.
Finishing your razor is something very personal. Each of us needs to find out which medium and which progression produces that final edge that we love. The progression is the same as doing touch ups. Do laps in small increments until the razor is dialed in. We at A Sharper Razor are never satisfied and are always pushing for a sharper, smoother edge.
Part 7: How to Hone & Hold the Razor
Now that you have the plan laid out, it is time to discuss the actual honing of a razor. I will discuss how to grip the razor and guide you through an x-stroke.
The Grip
You grip the tang of the razor in between the thumb and index finger. Your pinky finger should be curled around the scales. The other two fingers are support fingers and should be curled around the scales/tang. The only pressure needed by the index and thumb is whatever is necessary to control the razor on the stone. You do not need to grip the tang tightly at all. The pinky finger controls the angle of the blade in relation to the surface of the hone. This will make more sense after reading the rolling stroke section.
The Platform
It is possible to hold the hone in your hand. However, if the hone is heavy, this becomes extremely uncomfortable. In addition, your hand is not a stable surface. Placing the hone on your lap is an option, but the best option is to place the hone on a stable surface, i.e. a table. You don’t have to follow this advice, but I get better results “benching” the hone.
The Straight Stroke
Also known as the push method, you simply push the razor straight across the hone. This method only works with perfectly flat razors. Any imperfection in the edge will result in an uneven hone and dull spots.
The X-Stroke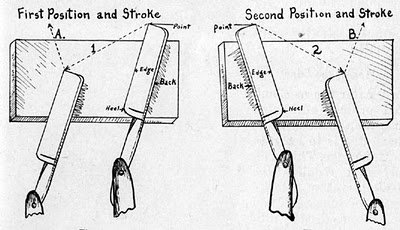
The X-stroke is the most popular means of honing. Simply put, it works. The x-stroke helps to overcome any irregularities in the spine/edge and hone. Much thought has been devoted as to why the x-stroke works, but that is not the purpose of this guide. That said, a push stroke will also work. A push stroke is also self explanatory and needs no guide.
The stroke starts by laying the razor on the hone, the entire spine and edge should be touching the surface. Some people start the razor at a slight angle, but you can start the razor perpendicular to the hone.
If sitting, keep your elbow at or slightly above the level of your hand; if standing your elbow will naturally position itself above the hand (unless the hone is chest high). Pull the razor towards you and to the right. Pull straight towards you, not down, not up (this is why you keep your elbow at/above hand level). Use your pinky finger to make sure the spine and edge are flush with the stone.
Rotate the razor on the spine as shown. NEVER ROTATE THE RAZOR ON THE EDGE. For obvious reasons.
After facing the razor in the opposite direction, repeat the above steps in the opposite direction.
Part 8: Other Tips and Guides
In this final section of our Beginner’s Honing Guide, we share with you some final tips and tricks you need to know. The first is the rolling x-stroke. Necessary for tackling smiling or frowning blades. Also useful for non-straight line edges. The second is the water and marker test. Necessary to know whether you can move on in your progression. AKA: whether your actually doing anything to the edge.
Rolling X-Stroke
The rolling-x is needed for razors with a pronounced smile. The stroke is exactly the same as a regular X-stroke, but the pinky is used to control the angle of the razor. The pictures below are an exaggerated rolling-x. The stroke starts with the heel of the razor lower than the toe. The middle is honed parallel to the surface of the hone, and the stroke is finished with the heel higher than the toe. The pictures explain the process. To adjust the height, adjust the tension of your pinky finger.
Other methods are possible. It is not the goal of this article to explain them all. If you have difficulty honing your razor, you are much better off sending it to a honemeister. For more information and animation, please click here.
Water & Marker Test
To help determine whether the entire edge or the part of the edge you are honing is actually making contact with the hone, you can watch the water in front of the edge. The edge should be acting as a snow plough and displace all the water in front of it.
The marker test is to take a permanent marker, color the edge of the razor, do a couple of strokes on your stone and check under magnification if the very edge still has marker on it. If the entire bevel is shiny, your stroke is fine and the bevel is established. This test is best used in conjunction with optical magnification. We recommend a good microscope, or at the very least, a top of the line jeweler’s eye loupe.
